Most layouts look fine on paper. The trouble shows up when a full sheet of ply has nowhere to turn, or the miter saw steals every square inch. This chapter helps you plan a woodworking shop layout that respects real tool envelopes, walking lanes, and outfeed space. Not glamorous, but it saves you from rebuilding the shop twice.
This chapter is part 2 in the Set Up a Woodworking Shop series.
Christophe,
If you’re just getting started, read the Set Up a Woodworking Shop guide first to follow the journey in order.
Earlier step in the journey? Go back to Finding Your Woodworking Space (Part 1).
Founder of Ash Stag Woodworking
Choose where you want to start:

Workflow Zones & Tool Placementment Layout
Rough cut, milling, joinery, assembly, finish. Keep it flowing.
Choose where you want to start:
Workflow Zones & Tool Placement
Rough cut, milling, joinery, assembly, finish. Keep it flowing.

– Updated on
Key Takeaways
– You’ll design a woodworking shop layout that protects infeed, outfeed, and walking lanes before anything else.
– You’ll learn how to adapt small shops, one-car garages, and basements without wrecking workflow.
– You’ll map real tool envelopes so floor plans reflect how boards actually move.
– You’ll choose a layout planning method that helps you commit and build, not just dream.
– You’ll organize workflow zones so rough cutting, milling, joinery, and assembly flow in a straight line.
Disclosure: At zero cost to you, I may get commissions for purchases made through links in this post. I earn from qualifying purchases as an Amazon associate. Products featured are selected based on quality, performance, and reputation, regardless of affiliate relationships.
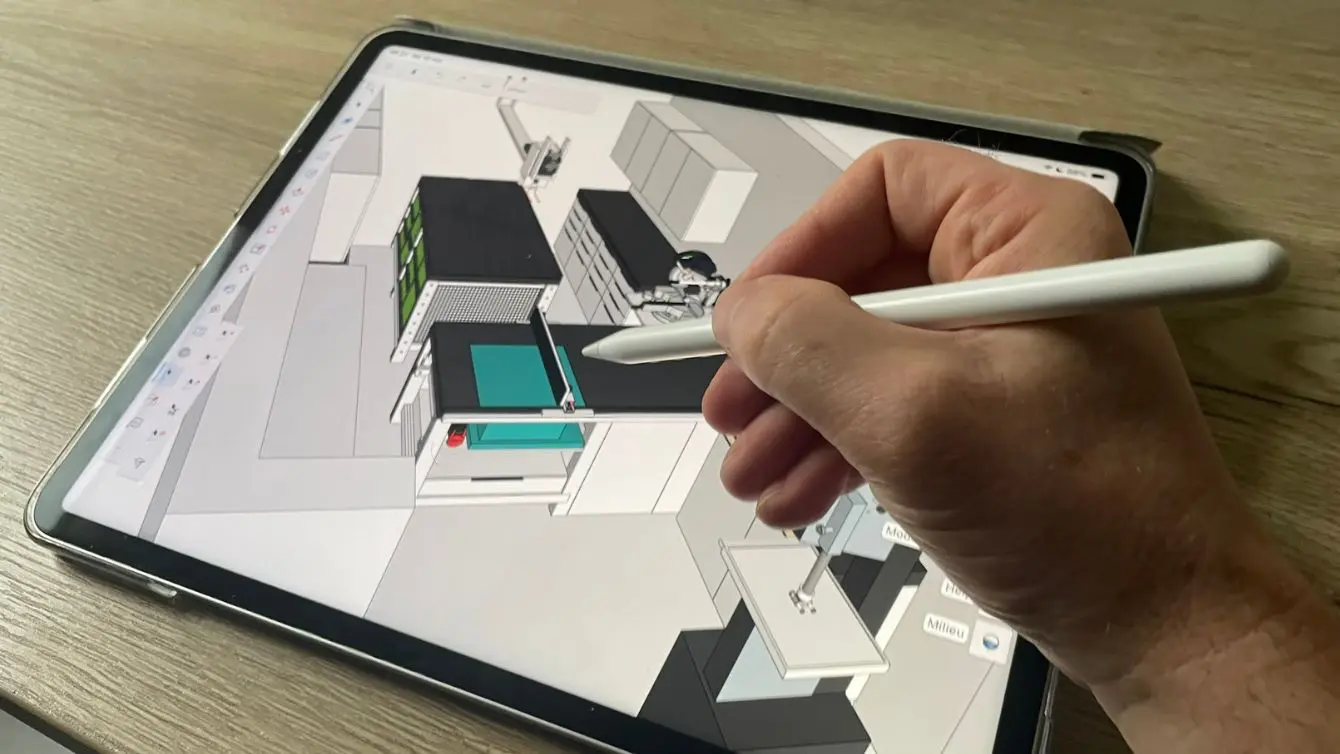
Table of Contents
Understanding a Woodworking Shop Layout
A woodworking shop layout is more than just where your tools stand, it’s the rhythm of how you move, think, and build. The moment you start planning the layout, you’re really shaping how efficient and enjoyable your time in the workshop will be. A good layout doesn’t come from guessing. It comes from observing how you work, anticipating your next step, and designing around it.
Whether you’re working in a small garage, a basement, or a shared space, the same principles apply. You want a layout that supports workflow, safety, and comfort, no matter how tight the space feels. Later in this article, you will find the common woodshop layout ideas for your shop.
The Core Elements of a Functional Woodworking Shop Layout
| Aspect | Why It Matters | Example or Tip |
|---|---|---|
| Workflow | Keeps every tool and surface where it naturally belongs. | Place your table saw and assembly table close together to minimize walking. |
| Lighting | Prevents mistakes and fatigue. | Combine ceiling LEDs with task lights over the bench. |
| Power Access | Reduces cable clutter and hazards. | Run multiple outlets along walls instead of relying on long cords. |
| Ventilation & Dust Control | Keeps the air breathable and the tools lasting longer. | Use a small portable dust collector connected to key machines. |
| Movement & Safety | Makes every step feel effortless, even in small spaces. | Leave at least 90 cm (36 in.) of clear walkway around key stations. |
A Practical Way to Plan Your Layout
Start with paper or tape on the floor: seriously, it’s the simplest workshop layout planner there is.
Sketch or mark the footprint of each machine and table, then walk through it like you’re building a project. Do you bump into anything? Do you have space to swing a board or a panel? If not, shift things around.
“The best layout isn’t the one that looks perfect on paper. It’s the one that lets you build for hours without frustration.”
This process helps you see how materials move through your shop, from rough cutting, to jointing and planing, to assembly and finishing. If you ever feel unsure where to place a tool, follow the path of the wood itself.
Common Layout Styles
- Linear Workflow – Tools arranged in a straight path, ideal for narrow or single-bay garages.
- L-Shape Workflow – Workstations wrap around two walls, perfect for balancing machine and bench work.
- Island Workflow – Central bench surrounded by tools on every side, great for flexible movement.
Each of these has its strengths, but the goal remains the same: minimal walking, safe spacing, and clear visibility of your tools.
Tip: If you’re unsure where to begin, start by building around your main workbench. It anchors your entire layout. From there, group your tools by task: cutting, shaping, assembly, and finishing. Every other decision becomes easier once you define those zones.
Personal Note: Why Layout Matters to Me
When I first turned my one-car garage into a woodworking shop, I had to think about every centimeter. I’ll be documenting that full transformation right here, from the first wall I built to the last light I hung. You can follow along and recreate it in your own space.
That’s the difference: I don’t just talk about layouts, I live them, build them, and refine them.
“This isn’t theory. It’s a real shop evolving one project at a time.”
If you’re serious about learning from an actual working setup, keep following the journey. It’s all part of the Woodworking Shop Layout series, and it’s designed to help you build smarter, not just bigger.
Small Woodshop Layout Ideas
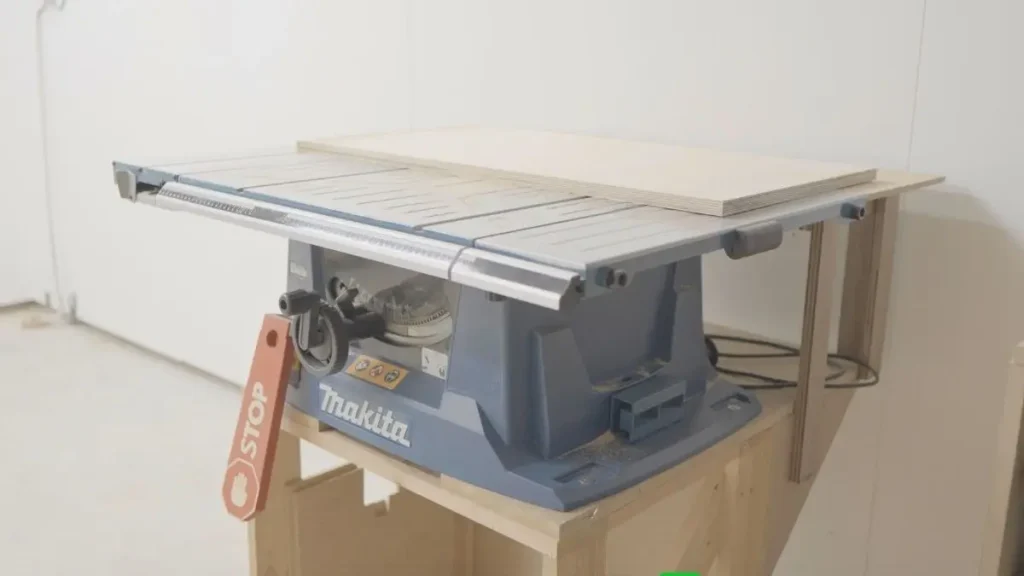
Working in a small woodworking shop isn’t a limitation, it’s a design challenge that forces creativity and precision. When space is tight, every decision matters: where to walk, where to store tools, how to switch between tasks without constant setup changes. The reward is a space that feels built around you instead of one you’re squeezed into.
“A well-designed small shop doesn’t feel small at all. It feels intentional.”
Think in Zones, Not Walls
Instead of seeing your space as four cramped walls, start thinking in functional zones.
Each zone represents a part of your workflow:
| Zone | Main Purpose | Key Tools |
|---|---|---|
| Cutting Zone | Break down boards or sheets. | Table saw, miter saw, track saw |
| Shaping Zone | Refine or trim pieces. | Router table, planer, sander |
| Assembly Zone | Put projects together. | Workbench, clamps, glue-up space |
| Finishing Zone | Sand, stain, and apply finish. | Finishing table, drying rack |
You might not have room for four physical zones, and that’s fine, the trick is to make one surface do multiple jobs.
Space-Saving Layout Ideas
- Mount your miter saw on a folding or rolling stand that tucks away under the bench.
- Build modular storage with drawers or shelves that align with your workbench height.
- Use vertical space: wall-mounted French cleats or pegboards are gold.
- Keep your dust collection system portable and share it between machines.
- Invest in fold-down work surfaces for quick extra workspace when needed.
Small doesn’t mean basic; it means smart. When every inch has a purpose, your shop becomes faster, safer, and more enjoyable to use.
Tip: When you plan a small woodworking shop layout, start with a full-size floor outline on the ground using painter’s tape. Move around, pretend to work. If you can move freely without bumping your elbows, you’re close to a good setup.
Bonus Table: Ideal Clearances in Small Shops
| Task | Minimum Space Needed | Notes |
|---|---|---|
| Between tools | 75–90 cm | Enough to walk and turn safely |
| Around the workbench | 90 cm minimum | For clamping and assembly |
| Tool clearance behind/outfeed | 120 cm | For full sheet handling |
| Ceiling height | 210 cm minimum | Allows upright tool use and dust piping |
If you’re ready to dive into the details, see the full guide:
Small Shop Layout: How to Maximize Tight Spaces (Under construction). It includes floor plan examples and real setups that prove small doesn’t mean limited.
One-Car Garage Workshop Layout
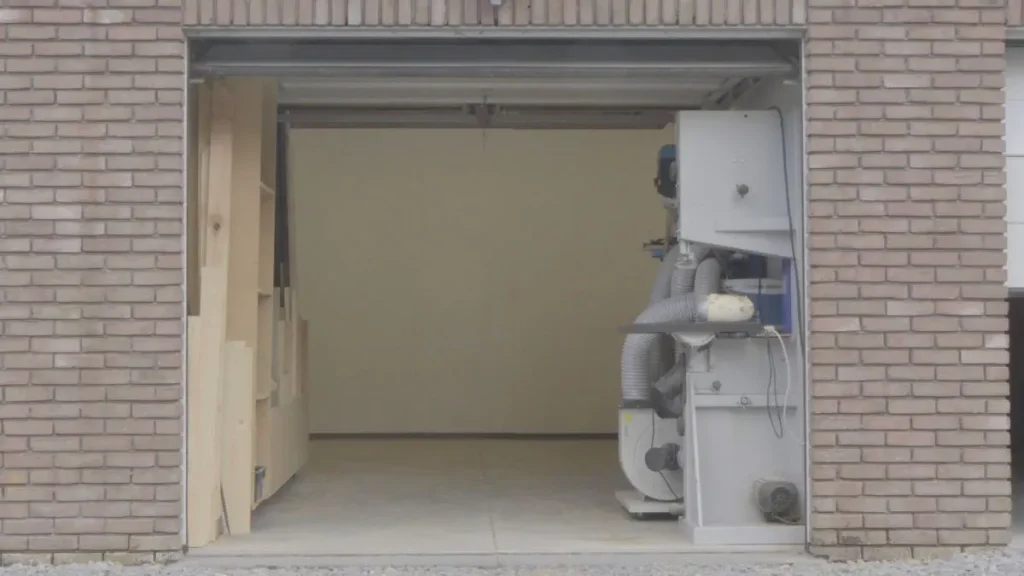
A one-car garage is the most common home workshop space, and it’s where many real woodworking journeys begin. You’ve got a concrete floor, one wide door, maybe a few outlets, and a dream to turn that box into a fully working shop. It’s not ideal, but it’s real, and with good planning it can become one of the most efficient shops you’ll ever work in.
“Every garage can become a workshop. The trick is to treat it like a studio, not a storage room.”
Start With Mobility
Nothing in a one-car garage should be truly fixed unless it has to be. Build or buy tools on wheels, design foldable work surfaces, and store what you rarely use higher up. Mobility lets you rearrange your shop based on the project at hand and roll everything aside when you need to park a car or open the door.
Common mobile stations
- Table saw with outfeed table on casters
- Flip-top bench combining planer and sander
- Rolling cart for clamps or sanding gear
- Mobile miter saw stand with folding wings
If you can roll it, you can reimagine your workflow anytime.
Plan Around the Door
That big garage door is both your best friend and your biggest challenge. It gives you ventilation, light, and access for large materials, but it also eats wall space and limits where you can hang tools. Many makers keep their heavy tools near the door for easy loading and dust control, then arrange benches and cabinets along the side walls.
Example Garage Workshop Layout Concept
| Area | Purpose | Notes |
|---|---|---|
| Front (near door) | Heavy tools, cutting zone | Good ventilation and easy dust collection |
| Middle | Workbench and assembly | Central, best lighting, power access |
| Back wall | Storage, charging, smaller tools | Use vertical space, French cleats |
| Ceiling | Clamp racks, retractable cords | Keeps floor clear and safe |
Tip: Install bright LED lights across the ceiling, not just in the middle. Garages often have shadows that hide details, and better light instantly makes the space feel bigger and cleaner.
Personal Note
This is where my own story begins. I’m converting my one-car garage into a complete woodworking shop, and I’ll be documenting each step on my site so you can follow along. From planning the first layout sketch to building cabinets and setting up power and dust collection, you’ll see the process as it happens. You can use the same ideas to shape your own garage into a working studio that feels crafted rather than improvised.
“Real woodworking doesn’t start with more space. It starts with making better use of the space you already have.”
If you want to see the transformation and detailed plans, go to One-Car Garage Woodworking Shop Layout: Realistic Guide and Lessons Learned (Under construction)
Basement Woodshop Layout Ideas
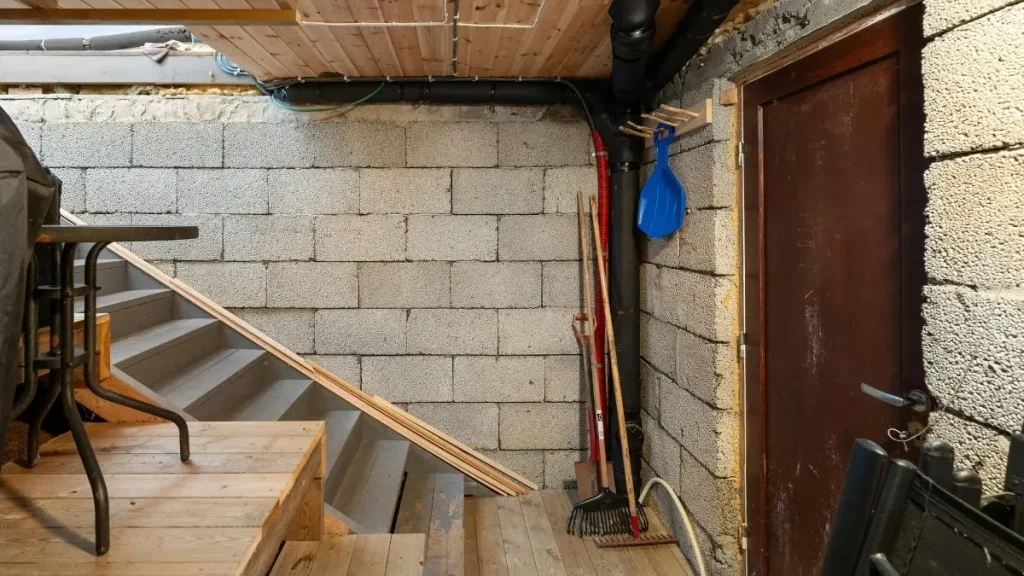
A basement workshop feels different from any other kind of shop. It’s quieter, more isolated, and usually the only space available when the garage or shed is already taken. But it comes with its own challenges: low ceilings, limited airflow, and stairs that make every sheet of plywood feel like a workout. Still, when done right, a basement can be one of the most comfortable and consistent work environments you can build.
“A basement shop can be a peaceful refuge, if you learn how to make it breathe.”
Handle the Climate First
Before moving in your first tool, look at how the air moves. Basements often trap humidity, and moisture is the enemy of both wood and steel.
- Use a dehumidifier year-round to keep humidity under 55%.
- Seal concrete walls and floors to prevent dampness.
- Add a small exhaust fan or vent system to remove fine dust and fumes.
If you can control the air, you can control almost everything else in a basement shop.
Light Makes or Breaks the Space
Most basements rely on a single bulb or two, which flattens the entire room. Bring in layered lighting: bright overhead LEDs, task lights at the bench, and a soft light for photography or video. Even a small window well can make a big difference if you frame it in white and keep it clear.
Make Use of Every Wall
Low ceilings often limit vertical storage, but that doesn’t mean wasted space. Short cabinets, French cleats, and magnetic strips can all fit along the perimeter. Keep your heaviest machines near structural walls to reduce vibration.
| Basement Challenge | Smart Fix |
|---|---|
| Limited headroom | Use shorter workbenches and foldable stands |
| Poor air circulation | Add vent fans or connect to HVAC |
| Dust buildup | Seal doors and use portable collectors |
| Noise transfer to upstairs | Install rubber floor mats and insulation panels |
Tip: If your dust collector or compressor is too loud, build a small insulated closet for them in a corner. The sound drop is huge, and you’ll gain back a sense of calm that makes long sessions more enjoyable.
For full details on insulation, dust control, and noise reduction, read Basement Woodshop Layout: Tips and Challenges. (Under construction)
Woodshop Floor Plans and Movement
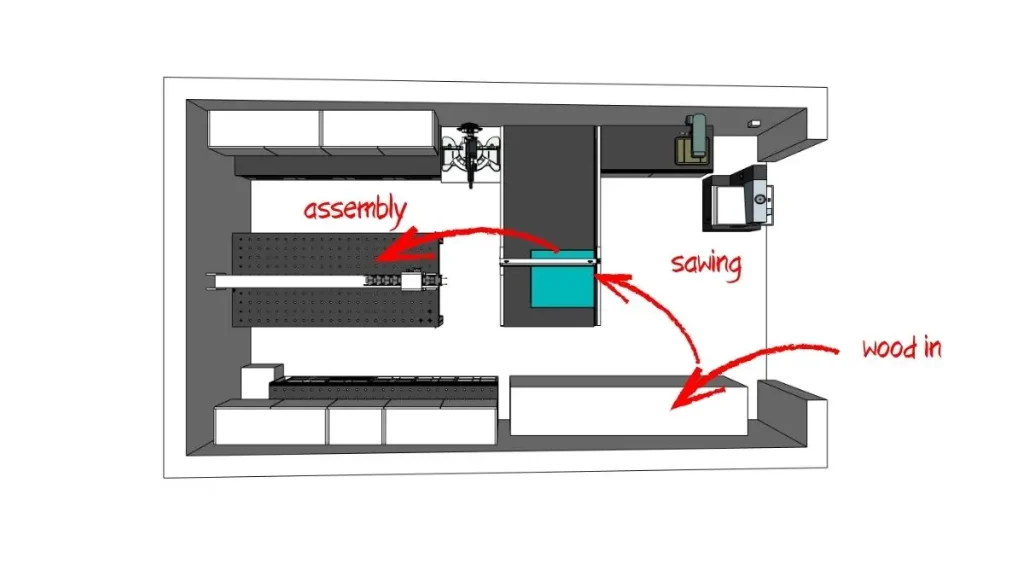
Even the best tools can feel clumsy if your woodshop floor plans doesn’t support the way you move. A well-designed woodworking shop layout is really about flow, how you move from cutting to shaping to assembly without bumping into something or crossing cables. When your layout matches your rhythm, every task feels smoother and faster.
“A workshop that flows well gives you time back you didn’t know you were losing.”
Understand Your Workflow
Think of your projects as a path. Raw lumber enters, gets cut, shaped, assembled, and finished. Each step should happen in a logical sequence, with the shortest walking distance between stages. If you ever find yourself turning around too much or dragging heavy panels across the room, your flow needs work.
Typical Material Flow
- Lumber Storage – near the entry or door for easy unloading
- Cutting Zone – table saw and miter saw close together
- Shaping Zone – planer, router, sander
- Assembly & Finishing – centered area with best lighting
A small rearrangement can save hours of fatigue across a week of building. Later in this article I will go deeper into the workshop zones for woodworking.
Common Floor Plan Styles
| Layout Type | Ideal For | Description |
|---|---|---|
| Linear | Narrow garages or shared spaces | Tools line up along one wall or in a straight path. |
| L-Shape | Corners or medium shops | Allows clear zones for machine work and hand work. |
| U-Shape | Larger dedicated shops | Central standing area surrounded by tools within reach. |
| Island | Flexible modern shops | A central bench anchors all movement and supports multiple workflows. |
Each layout works if it respects movement, spacing, and access to light and power.
Spacing Guidelines
- Keep 90 cm clear between machines or walls.
- Leave 120 cm behind saws and planers for outfeed.
- Avoid trapping yourself in corners where boards can’t rotate freely.
- Position power cords and hoses overhead or along walls to keep the floor clear.
Tip: Use painter’s tape to map your machines on the floor. Walk through your process with a board in hand. If you can carry a full panel from saw to bench without twisting or backtracking, your floor plan works.
Personal Note
I redesigned my own layout three times before it felt natural. The final version wasn’t the prettiest, but it matched how I actually worked. Sometimes you don’t need more space, just better movement.
“A good floor plan doesn’t look impressive, it feels right.”
To explore real examples and detailed diagrams, go to Woodshop Floor Plans: Optimizing Space and Workflow. (Under construction)
Workshop Layout Planners and Tools
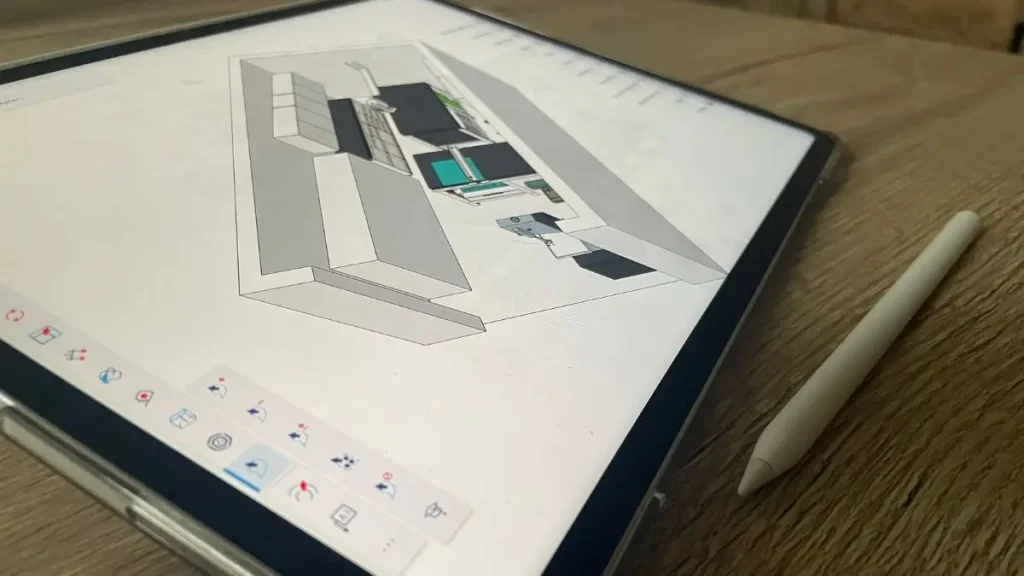
Before you move a single cabinet or plug in a tool, plan the layout on paper or screen. A good woodworking shop layout starts long before you start drilling holes or building benches. Planning lets you test ideas safely, adjust mistakes early, and visualize how your shop will really function day after day.
“Good builders draw twice and cut once, even when they’re building their workspace.”
Low-Tech Planning Tools
You don’t need software to start. Some of the best layouts begin with pencil, paper, and tape on the floor.
Try these:
- Graph paper with a 1-square = 10 cm scale
- Cardboard cutouts representing your tools
- Masking tape outlines directly on the floor
- A simple ruler and notepad for sketching workflow
The goal isn’t art, it’s clarity. You want to see how your tools interact and where you’ll walk, turn, and assemble.
Digital Tools That Help
If you like visuals, digital workshop layout planners can make the process faster and easier to tweak.
| Tool | Platform | What It’s Best For |
|---|---|---|
| SketchUp | Desktop or web | 3D visualization of your full workshop |
| Floorplanner | Web-based | Quick drag-and-drop layout planning |
| Fusion 360 | Desktop | Detailed modeling if you’re planning custom furniture |
| Magicplan | Mobile | Fast room scans using your phone’s camera |
A digital layout doesn’t have to be fancy. Even a simple top-down drawing helps you see spacing issues before they happen.
Tip: Once you’ve made a layout you like, print it or keep a screenshot. After you’ve worked in your shop for a few months, look at that plan again. You’ll see how your real habits differ from what you expected, and you can adjust your layout to fit the way you actually work.
Personal Note
When I designed my own shop in SketchUp, I realized how many times I would’ve built things twice if I hadn’t modeled them first. Seeing the space in 3D helped me predict clearances, lighting angles, and tool access long before touching real lumber.
“Planning isn’t wasted time. It’s the best project you’ll ever build.”
If you want to explore the tools I use and see examples of digital and taped-out floor plans, visit Layout Planners and Tools. (Under construction)
Workflow Zones and Tool Placement
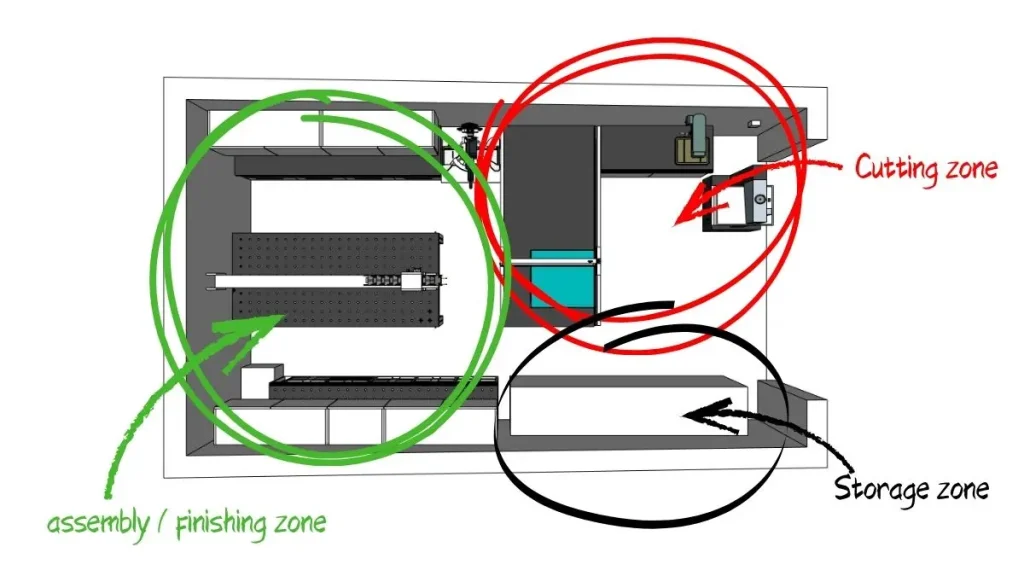
Once you understand the flow of your workspace, it’s time to fine-tune how each tool fits into that rhythm. Workflow zones are the invisible map of your shop, the places where your work naturally begins, transforms, and comes together. Getting this right turns a random set of machines into a workshop that feels purposeful and calm.
“When your tools have a place that makes sense, your mind can stay on the project, not the setup.”
The Four Core Workflow Zones
| Zone | Main Focus | Typical Tools |
|---|---|---|
| Cutting | Breaking down lumber or sheet goods | Table saw, miter saw, circular saw |
| Shaping | Refining edges, profiles, and joints | Router, planer, jointer, band saw |
| Assembly | Putting parts together | Workbench, clamps, glue-up surfaces |
| Finishing | Sanding, painting, or oiling | Sanding station, finish table, racks |
These zones don’t need walls between them; they just need a clear flow. The raw material should move from one zone to the next with as little backtracking as possible.
Practical Placement Tips
- Keep your workbench central, close to both cutting and assembly areas.
- Place machines that create long offcuts, like the table saw, where you have open outfeed.
- Store frequently used hand tools within one arm’s reach of the bench.
- Keep sharpening and maintenance tools together, away from dust-heavy zones.
- Use mobile bases if you share space between zones.
Even small adjustments, like turning the table saw ninety degrees or moving a clamp rack closer to the bench, can noticeably improve efficiency.
Lighting and Power by Zone
| Zone | Lighting Type | Power Consideration |
|---|---|---|
| Cutting | Bright overhead, focused on blade path | Dedicated circuit for saws |
| Shaping | Diffused side light to reveal profiles | Outlets along wall height |
| Assembly | Balanced light, no shadows | Several outlets for glue guns, sanders |
| Finishing | Adjustable warm light | Ventilated area with minimal cords |
Lighting and power are often overlooked in layout discussions, yet they’re what make every zone truly usable.
Tip: Mark each zone on your floor with tape while setting up. Walk through a full project from start to finish. If you find yourself turning or walking backward often, swap the order of two stations and test again.
Personal Note
I noticed my own workflow improved most when I grouped tools by mindset rather than by category. My cutting and shaping tools now form a single side of the shop, while assembly and finishing share the opposite wall. That one woodworking shop layout decision made the entire shop quieter, cleaner, and faster.
“Good placement turns chaos into routine, and routine into progress.”
For deeper guidance on tool groupings, power routing, and real layout examples, see Workflow Zones and Tool Placement. (Under construction)
Where to Go Next
If you’re ready to go deeper or move forward in the journey, here’s where you can head next.
Want more detail on this stage?
These guides belong to this chapter and cover each step in full:

Go to Step 1
(Under construction)
Small Shop Layout
Find out how to fit a full woodworking setup in half the space: smart layouts that actually work.
Go to Step 2
(Under construction)
One-Car Garage Layout
See how real makers turn a single garage bay into a productive woodworking space.
Go to Step 3
(Under construction)
Basement Layout
Learn how to make a basement shop comfortable, dust-controlled and well-lit without breaking code.
Go to Step 4
(Under construction)
Floor Plans & Movement
Discover how to map your workflow so every step, from cutting to assembly, feels natural.
Go to Step 5
(Under construction)
Layout Planners & Tools
Try digital and paper planning tools that help you visualize your ideal layout before you build anything.
Go to Step 6
(Under construction)
Workflow Zones & Tool Placement
Get pro insight into arranging tools and benches so you spend less time walking and more time building.
If you’re ready to go deeper or move forward in the journey, here’s where you can head next.
Go to Step 1 (Under construction)
Small Shop Layout
Find out how to fit a full woodworking setup in half the space: smart layouts that actually work.
Go to Step 2 (Under construction)
One-Car Garage Layout
See how real makers turn a single garage bay into a productive woodworking space.
Go to Step 3 (Under construction)
Basement Layout
Learn how to make a basement shop comfortable, dust-controlled and well-lit without breaking code.
Go to Step 4 (Under construction)
Floor Plans & Movement
Discover how to map your workflow so every step, from cutting to assembly, feels natural.
Go to Step 5 (Under construction)
Layout Planners & Tools
Try digital and paper planning tools that help you visualize your ideal layout before you build anything.
Go to Step 6 (Under construction)
Workflow Zones & Tool Placement
Get pro insight into arranging tools and benches so you spend less time walking and more time building.
Ready for the next chapter?
→ How to Design and Build the Essential Woodworking Workstations for a Smarter Workflow (Part 3)
Understand the core woodworkingstations and build them right.
Back to the full journey?
→ Set Up a Woodworking Shop (Main Guide)
Return to the Set Up a Woodworking Shop guide and follow the journey step by step.
Frequently Asked Questions
What is the best woodworking shop layout for beginners?
There is no single best layout. Start with safe infeed and outfeed for your main saws, keep a 90–100 cm aisle, and let the bench double as outfeed. That framework works in most small woodworking shop setups.
How wide should my walking lanes be?
Aim for 90 cm as a baseline. Go a little wider if you regularly turn sheet goods or carry assembled pieces.
Do I need a planner app, or is paper fine?
Paper and blue tape are perfect for your first pass. Move to a workshop layout planner or SketchUp when you want to lock measurements or test variations quickly.
Where should dust collection live in a small shop?
Near the machines you use most. A compact cart with a separator and quick-connects reduces hose wrestling and encourages you to actually use it.
Can I share parking with a one-car garage shop?
Yes. Keep tools on mobile bases, fold down when parked, and mark the car footprint so stations reset to the same place.
Trusted by Woodworkers Worldwide
29,000+ woodworking enthusiasts follow my journey. Over 60 real-world workshop projects completed since 2018.
Discover proven techniques to set up a woodworking shop that grows with you

Meet Christophe
Founder & Woodwork Artisan Behind Ash Stag Woodworking
Regards, Christophe