
So You Want to Build a Woodworking Shop That Actually Works?
Let’s be honest: throwing a bench in a corner and plugging in a miter saw isn’t really planning a woodworking shop. It’s improvising. And while that might get you through your first few cuts, it won’t get you far, or keep you sane.
Before you start building, take a moment. Let’s plan something that actually works.

– Updated on
Key Takeaways
– Why planning beats fixing, and saves your back, your budget, and your sanity
– The four questions that shape your shop before you build a single thing
– Common workshop layout fails (and how to dodge them)
– How to organize your shop into smart zones that just flow
– What tools, tech, and ergonomics to think about before lifting a hammer
Disclosure: At zero cost to you, I may get commissions for purchases made through links in this post. I earn from qualifying purchases as an Amazon associate. Products featured are selected based on quality, performance, and reputation, regardless of affiliate relationships.

Table of Contents
Let me guess.
You’re fired up. Tools lined up in the garage, a SketchUp tab open with ten wild ideas, and maybe, just maybe, that leftover sheet of MDF is already whispering “build me” from the corner.
I get it. We’re makers. We want to build, not spend hours with a tape measure wondering if we need one more outlet.
But here’s the thing I learned the hard way (and maybe you’ve been there too):
Every hour you spend planning your workshop saves you five hours of frustration later.
I’ve built three shops so far. The first one? Just a pile of tools crammed into the corner of our kids’ playroom, which I had to haul outside every time I wanted to cut a board. Not ideal, especially when stepping over LEGO sets with a circular saw in hand.
The second was in my garage, with plenty of garden gear: lawnmower, leaf blower, hedge trimmer… basically anything with a loud engine and a thirst for space.
And now this one: not huge, but finally a functional space that actually works with me instead of against me.
The difference? I finally stopped winging it and started thinking in terms of a real woodworking workshop layout, not just where tools fit, but how everything flows.
In my previous shop, I did what most DIYers do: shoved tools against walls, dropped power cords wherever they reached, and promised myself I’d “fix it later.” But “later” turned into endless do-overs. Recutting cabinets. Moving the miter saw for the fourth time. Relearning how to walk through the space without catching a chisel to the shin.
And don’t get me started on that one layout where my miter saw almost fit, unless you wanted to cut anything longer than three feet without performing a limbo routine.
Here’s the real point:
A basic wood shop set up isn’t about cramming as many tools into a room as possible. It’s about flow. Comfort. Efficiency. It’s about how you work, how your brain moves through a project.
Get that wrong, and the entire shop feels off.
Get it right, and suddenly you’re not just building projects, you’re building momentum.
So whether you’re a weekend hobbyist or going full pro, this part matters more than most people think. Not in a dry, spreadsheet kind of way. But in a “man, I actually love being in here” kind of way.
No wasted steps. No regrets. Just a space that works with you, not against you.
Ready? Let’s map this thing out together.
Why Planning a Woodworking Shop Beats Fixing (Every. Single. Time.)
You can fix a bad cut with a shim. You can fix a misaligned joint with a bit of sanding and a creative clamp setup.
But a bad woodworking workshop layout? That’s a beast of its own.
You can’t shim your way out of putting your router table in the only walkway to your workbench. You can’t “just fix it” when your dust collector ends up behind three other machines, unless you like doing the shop-floor shuffle every time you flip a switch.
Ask me how I know.
In one of my earlier setups, I spent an entire weekend building a beautiful workbench. Perfect plywood. Soft-close drawers. It was glorious, until I realized it blocked the only clear line to my miter saw’s outfeed. Every project turned into a dance routine.
The truth? Fixing is reactive. Planning is strategic. And while building feels like progress, planning is what makes your progress last.
So if you’re debating whether to sketch out a shop layout or just start cutting, let me say this:
Planning your woodworking shop is the project before the projects.
It’s what turns a chaotic pile of tools into a space that actually supports your workflow, instead of fighting it.
Pro tip #1: The Four Things to Figure Out First
Before we talk woodworking workshop layout, bench height, French cleats, or where to mount that vintage hand plane collection… let’s slow down.
Planning a woodworking shop doesn’t start with SketchUp.
It starts with you.
Here are the four questions that will shape everything else, from where your workbench goes to how often you’ll mutter “what was I thinking?” under your breath.
1. How much space do you actually have?
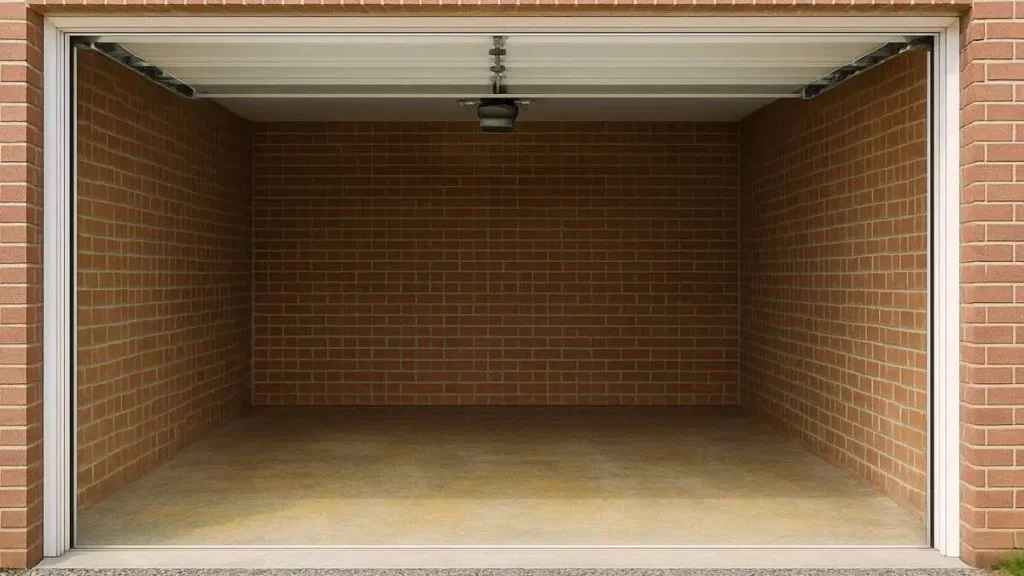
Not “someday when I clean out the garage” space.
Not “well if I stack the bikes and hang the Christmas tree from the ceiling” space.
Your real, usable, tape-measure-confirmed space.
Grab a notepad, sketch the outline, and write down the actual dimensions, wall to wall, floor to ceiling. Don’t forget to include obstacles like doors, windows, radiators, or that weird pipe sticking out of the floor you’re afraid to ask about.
Want a walkthrough? See: How Much Space Do You Really Need for a Woodworking Shop? (Still working on this post, want to be the first to read it? Join the newsletter and I’ll send it your way when it’s ready.)
2. What kind of work do you want to do?
This one’s easy to skip, but it matters a lot when you need to plan a woodworking shop.
Are you building furniture? Cabinets? Small decor pieces? Jigs and shop furniture? Each of those demands different tools, workflows, and space priorities.
If you mostly make cutting boards and small boxes, you don’t need a 12-foot outfeed path for a cabinet saw. If you’re planning to build built-ins or full-size furniture, you absolutely do.
This also affects what stations you’ll need, sanding, assembly, finishing, and how you prioritize dust control or tool mobility.
3. What tools do you already own, and what’s coming soon?
Don’t plan your woodworking workshop layout around the tools you wish you had.
Plan around the ones you’ve got… and the ones that are realistically next.
If your table saw is old and unreliable, but a new one’s on your wishlist for the fall, leave space for it in your plan.
If your drill press is staying, build around it. Don’t pretend it’s invisible.
Bonus tip: If it has a cord, it needs a home.
That includes your shop vac, battery chargers, and even your coffee maker (don’t judge, mine has a permanent place).
4. How do you like to work?
This one gets overlooked all the time.
Do you move tools to the workpiece or move your workpiece to fixed stations? Do you clean as you go, or do you embrace the chaos and sweep once a week (or… never)?
Your workflow matters.
There’s no “one right way”, but there is a right way for you.
If you love having everything mobile and flexible, your layout should reflect that. If you prefer fixed stations and minimal movement, that’s a different strategy. The key is: know thyself. Your shop will thank you.
Once you’ve answered these four questions, you’ve got a foundation that actually means something. Now, and only now, we can start talking about layout traps to avoid.
Spoiler: there are more than you’d think.
Pro tip #2: Avoid These Classic Workshop Layout Fails
Even with good intentions (and a fresh SketchUp file), it’s easy to design a workshop that looks great, and feels like a disaster once you actually start using it.
I’ve fallen into all of these traps at some point. And yes, they all seemed like a great idea at the time.
Here are the usual suspects, and how to dodge them like a pro:
❌ Pushing everything up against the walls
Feels logical, right? Keep the center open. Maximize floorspace.
Except… now your table saw has no outfeed. Your jointer is eating drywall. And your miter saw is boxed in tighter than a suitcase on the last day of vacation.
What to do instead: Float tools that need infeed/outfeed space, and use the center of the room wisely, not just as a dance floor.
❌ No room for material handling
If you’ve ever tried to rip a full sheet of plywood solo with two feet of clearance, you know what I mean. It’s not woodworking. It’s cardio.
What to do instead: Leave generous space in front and behind cutting tools. Plan for the size of your materials, not just the footprint of your machines.
❌ Too few outlets (and too many cords)
Here’s the rule: however many outlets you think you need… double it. Then add two more for your future self.
What to do instead: Spread outlets around the room. Add some up high. Wire for dust collection, lighting, chargers, the works. And if you’re running extension cords under your feet, stop reading this and go fix that now. I’ll wait.
❌ Placing tools without thinking about flow
The miter saw’s in the corner. The boards are on the opposite wall. The workbench is somewhere in between. Now every project feels like an obstacle course.
What to do instead: Group tools that belong together (cutting, assembly, finishing), and think like a piece of wood: if youwere a board, how smoothly could you move through your own shop?
Planning helps you avoid all of this, or at least makes fixing easier down the line.
And hey, even if you mess something up (we all do), you’ll do it with a plan, not a shrug.
Need layout inspiration? Check out: 3 Common Layouts for Small to Medium Woodworking Shops (Still working on this post, want to be the first to read it? Join the newsletter and I’ll send it your way when it’s ready.)
Pro tip #3: Map Out Workflow Zones (and Thank Yourself Later)
A smooth workshop feels a lot like a well-designed highway: the flow just works.
You’re not tripping over cords, backtracking for clamps, or carrying heavy boards in weird zigzags. Instead, everything moves with purpose, from raw lumber to finished project.
And that kind of flow doesn’t happen by accident.
It starts with zoning.
Here’s how I like to think about it:
Cutting Zone
This is your heavy hitter area.
It’s where wood enters the shop and gets broken down into usable parts.
You’ll likely have your:
- Miter saw
- Table saw
- Jigsaw or track saw station
Position these so you have plenty of space for infeed and outfeed. Don’t skimp. That one awkward cut you can’t quite make without hitting a wall? That’s the cut that haunts you.
Assembly Zone
Think: large, flat, uncluttered surface.
For most of us, this is the workbench, ideally centered, with access on at least two sides. Bonus points if you’re not constantly clearing it off to make space.
Pro tip? Build it the right height for you, not for Pinterest.
This is also where you want to be near clamps, glue, squares, and all the stuff you always need mid-assembly but never seem to find.
Finishing Zone
This one gets overlooked, until you try applying finish right next to a saw that’s still kicking up dust.
You want this zone to be:
- As dust-free as possible
- Out of the traffic path
- Close to ventilation, or with good airflow options
If your space is tight, consider using collapsible tables or mobile carts that can be tucked away when not in use. Just don’t finish your project on the same surface you just routed dados on.
Been there. Sticky mess.
Storage Zone
Vertical space is your best friend here.
Use walls for:
- French cleats
- Cabinets
- Pegboards
- Tool walls
- Even ceiling-mounted racks for long stock
Keep storage close to where you use things, but not in your main movement zones. Otherwise you’ll constantly be stepping around your own stash of offcuts and sanding blocks.
Design these zones with your workflow in mind. Walk through a typical project in your head, from cutting to final coat, and ask yourself:
“Where would I put this… if I didn’t want to move it twice?”
Want to go deeper? Check out: How to Plan Workflow Zones for Maximum Efficiency (Still working on this post, want to be the first to read it? Join the newsletter and I’ll send it your way when it’s ready.)
Pro tip #4: Grab a Planning Tool (or Two)
If you’re anything like me, your brain has already started mentally shuffling tools around the room like a game of woodworking Tetris.
That’s great.
But before you lift your table saw (or your back), get it down on paper. Or screen.
Planning a woodworking shop help you test layouts before committing to a full-day rearrangement followed by regret and lower back pain.
Plus, it’s way easier to “move” your workbench digitally than to realize you built it six inches too wide… after you’ve added drawers, a vise, and three coats of finish.
Here are some tools I’ve used, and why they’re worth your time:
SketchUp
Great if you like going full 3D mode.
You can model your exact room, import tool dimensions, and even simulate workflow.
It has a learning curve, but if you’re a visual thinker (and enjoy building your shop twice, once virtually, once in real life), this is your jam. Sketchup is the tool I use the most for designing furniture and planning a woodworking shop.
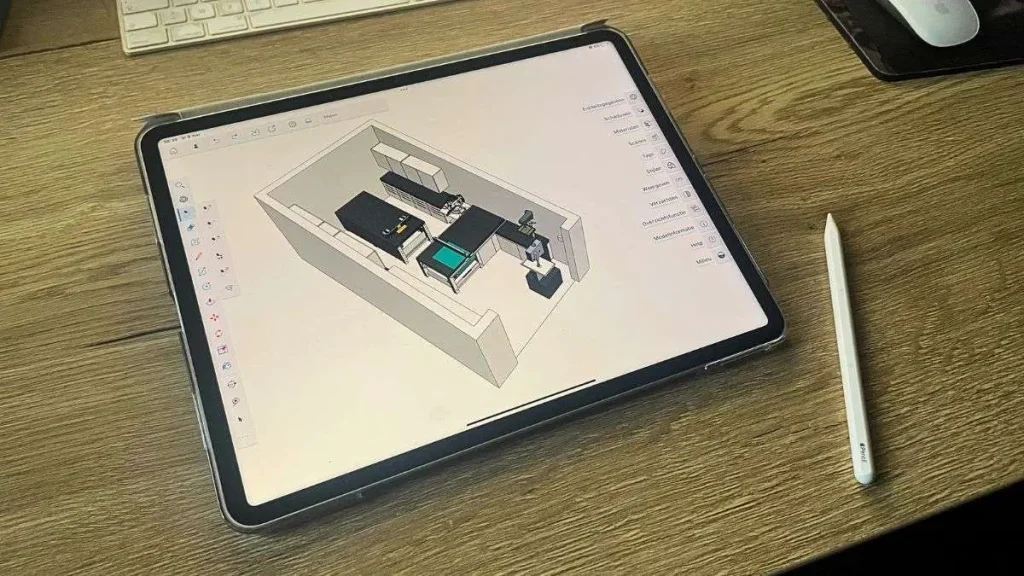
Shapr3D (for iPad)
Slick, intuitive, and made for touch-based design.
It’s great for on-the-go planning, or if you’re the type who gets inspired in the middle of the night and wants to start sketching from the couch.
Good old-fashioned grid paper
Never underestimate the power of pencil and paper.
One square = one foot.
Cut out little models of your tools and slide them around like you’re playing shop-layout Monopoly. It’s simple, satisfying, and surprisingly effective.
There’s no single right way to plan.
Use whatever helps you see your space clearly before you start cutting lumber and second-guessing everything.
Need help getting started? Read: The Best Free Tools and Apps to Design Your Workshop Layout (Still working on this post, want to be the first to read it? Join the newsletter and I’ll send it your way when it’s ready.)
Pro tip #5: Don’t Forget Ergonomics (Unless You Love Back Pain)
Let’s get one thing straight:
If you’re 6’2” and you build a workbench for someone who’s 5’7”, you’re not doing yourself any favors.
Ergonomics isn’t just a fancy word for “comfortable.”
It’s what keeps you working longer, safer, and without grumbling every time you pick up a sander.
And trust me, I’ve learned this the hard way. I once built a beautiful workbench… and spent the next six months hunched over it like a gremlin because the top was three inches too low. That’s not woodworking. That’s physiotherapy waiting to happen.
So, what should you think about?
Workbench Height
This one’s personal. There’s no “perfect” number.
As a starting point:
- If you’re doing joinery or fine detail work, go a bit higher
- For heavy-duty planing or assembly, lower is often better, more leverage
Need help deciding? Read: How to Choose the Right Workbench Height for Your Body and Tools (Still working on this post, want to be the first to read it? Join the newsletter and I’ll send it your way when it’s ready.)
Saw Station Alignment
If your miter saw or table saw is mounted too low, you’ll feel it in your back. Too high, and accuracy takes a hit.
Try to keep your saw tables flush with surrounding surfaces, like outfeed tables or carts. It makes long cuts smoother and prevents the awkward “hold-it-up-while-praying” stance.
Reach Zones
Ever notice how your most-used tools somehow always end up in the worst spots?
Plan your reach zones like a chef plans a kitchen:
- What do you grab constantly? (Tape measure, pencil, square?)
- What can stay further away? (Router bits, finishing oils…)
Keep your daily-use stuff within one arm’s reach while standing in front of your bench.
It’ll save you hours, and a lot of muttering.
Build your workshop around your body, not some generic standard.
You’re the one using it. Make it feel like it was built for you, because it was.
Pro tip #6: Power, Lighting, and the Invisible Stuff
Nobody gets excited about wiring.
Until you trip over your third extension cord, blow a fuse mid-cut, or try sanding in the shadows like some sort of woodworking vampire.
Power and lighting may not be sexy… but they make or break your shop. And unlike your clamp collection, you can’t just add more whenever you feel like it, at least not without cracking open a wall.
So let’s plan it right the first time.
Power Outlets (and Why You Never Have Enough)
Here’s the rule of thumb:
However many outlets you think you need… double it. Then add two more.
Spread them around the room, especially:
- Near each zone (cutting, assembly, sanding)
- Above benches or tool stations (think wall-mounted drills or chargers)
- High up for dust collectors, air cleaners, or even lighting
Avoid daisy-chaining power strips like it’s a Christmas light contest. It’s unsafe, annoying, and frankly beneath you.
Get started here: Electrical Planning for Your Woodworking Shop (Still working on this post, want to be the first to read it? Join the newsletter and I’ll send it your way when it’s ready.)
Lighting That Actually Lets You See What You’re Doing
Overhead shop lights are good.
Task lighting is better.
Both is best.
Use bright, neutral-white LEDs (4000–5000K) for your general lighting, flicker-free is key.
Then add:
- A swing-arm lamp at the bench
- Strip lights above tools
- Spot lighting near detail zones (like sharpening or finishing)
Your eyes will thank you. Your projects will look sharper. And you’ll finally stop staining things the wrong color because your shop is 40% shadow.
Need help figuring this out? Read: How to Light Your Workshop for Safety and Precision (Still working on this post, want to be the first to read it? Join the newsletter and I’ll send it your way when it’s ready.)
Dust Collection Access
Dust is sneaky.
Even if you “just cut one piece,” your lungs know the truth.
You don’t need a fancy cyclone system to start, but you do need a plan:
- Where will your vac/dust collector sit?
- How far is it from your main tools?
- Will you use fixed pipes, flexible hoses, blast gates?
Plan now, breathe better later.
(And yes, even sanding MDF once justifies the effort.)
Pro tip #7: Use Vertical Space Like a Pro
Let me guess.
You’re out of floor space… and yet somehow still tripping over stuff.
Here’s the good news: your walls are just sitting there, doing absolutely nothing, and it’s time they pulled their weight.
Vertical space is one of the most underused, overpowered assets in any woodworking shop.
And whether you’re in a single-car garage or a cozy garden shed, going up is how you create breathing room without knocking down walls.
Walls = Storage Goldmine
Use them for:
- French cleat systems (the holy grail of modular tool storage)
- Pegboards (great for visibility and quick-grab items)
- Cabinets (for dust-sensitive tools and supplies)
- Tool walls (layout your most-used tools like a surgeon’s tray)
Pro tip: Arrange by frequency, not category.
If you use your mallet daily but your coping saw once a month, guess which one deserves prime wall space?
Ceiling Storage? Yes, Please.
Long boards, seasonal lumber, spare MDF sheets, all of it can live above your head.
Install ceiling racks or build a simple lumber loft.
Just don’t store anything up there you’ll need weekly… unless you enjoy the ladder life.
Rolling Storage (That Tucks Away Neatly)
Not technically “vertical,” but rolling carts that nest under benches or slide into wall niches are a game-changer.
They give you:
- Flexibility
- Extra surface area
- Hidden storage that doesn’t feel like clutter
And yes, I built one just for glue bottles, clamps, and random sanding blocks that somehow multiply like rabbits.
Want inspiration? Check out: Planning Vertical Space in Your Workshop (Still working on this post, want to be the first to read it? Join the newsletter and I’ll send it your way when it’s ready.)
Planning a Woodworking Shop – Bring It All Together
Let’s be real, planning a woodworking shop doesn’t come with the same dopamine hit as cutting dovetails or unboxing a new Festool toy. But it’s the groundwork that makes all the fun stuff possible.
You’ve now walked through the key pieces:
- How to think in zones
- What layout traps to avoid
- Where to put your tools, outlets, and lights
- And how to use your vertical space like a clever, clamp-loving ninja
From here on, everything you build will have a purpose, because your space finally works for you, not against you.
And that’s where real momentum starts.
This isn’t about designing a picture-perfect workshop for Instagram.
It’s about building a space that matches your workflow, your tools, and your projects, one that makes you want to walk in, get to work, and lose track of time in the best way possible.
So: measure that space.
Sketch that layout.
Think it through now, and save yourself months of rearranging later.

This Was Step 1 of the Full Guide
This post about planning a woodworking shop is part of Step 1 of my full workshop setup roadmap.
If you want to dive deeper into specific parts of the planning process, explore the supporting posts by following the links in this article.
Ready to move from planning into building? Start Step 2: Building a Woodworking Shop – Avoid Regret with These 5 Keys
If you want to see the whole journey, Return to the main guide: How to Set Up a Woodworking Shop Like a Pro – 4 Clear Steps
Let’s build smart.
Let’s build something that lasts.
Let’s build it right from the start.
Christophe – Ash Stag Woodworking






Leave a Reply