
When I first started building a woodworking shop, my only tool was a table saw. I didn’t have a bench, let alone any kind of proper layout. So I did what a lot of beginners do: I worked on the floor.
Eventually, I cobbled together a rolling cabinet from scrap plywood so I could at least get the saw to waist height. It was wobbly, loud, and awkward-but it got the job done. For years, that little cart was my shop’s centerpiece. Until recently.
Now that I’m setting up a new space from scratch, I know it’s time to retire that makeshift stand – along with a few other quick-and-dirty stations I threw together in the early days – and finally build something that matches how I work today, not how I scrambled to make things work years ago.
In this guide, I’ll take you through the five key stations I created in my own DIY woodworking shop. Whether you’re a beginner setting up your first shop or a seasoned builder rethinking your space, these builds will help you building a wood shop that’s actually built to support your work.

– Updated on
Key Takeaways
– Discover the five must-have woodworking shop stations for a functional layout
– Learn how each one improves workflow, safety, and efficiency.
– Learn from real mistakes (and what I’d do differently today)
– See how workbench, saw stations, storage, and dust collection connect
– Build smarter with setups that grow with your tools and skills
– Click through to detailed build guides and downloadable plans
Disclosure: At zero cost to you, I may get commissions for purchases made through links in this post. I earn from qualifying purchases as an Amazon associate. Products featured are selected based on quality, performance, and reputation, regardless of affiliate relationships.
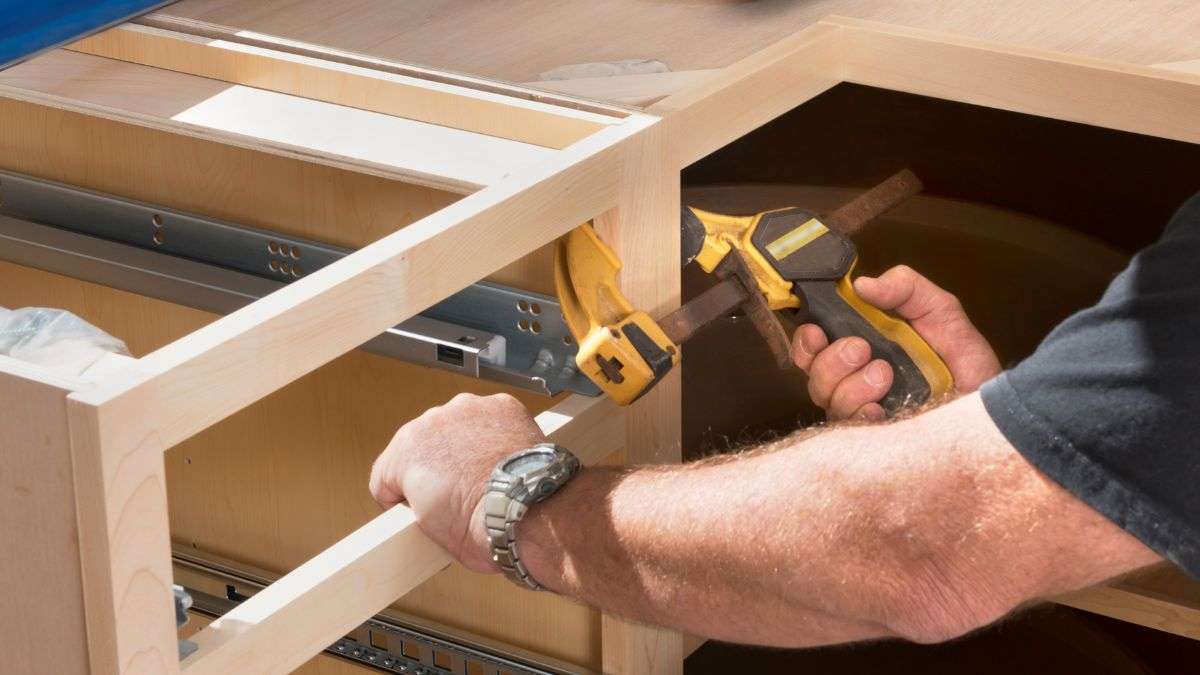
Table of Contents
We’re now in Step 2 of my full workshop setup roadmap. If you haven’t yet read Step 1: Planning a Woodworking Shop: 7 Pro Tips for Success, I highly recommend starting there.
That post helps you think through layout, lighting, priorities, and what you actually need. This one is about turning that plan into physical stations that work together.
Now, in Step 2, we focus on building a woodworking shop with workbenches, stations, cabinets, and more.
When you’re setting up a woodworking shop, it’s tempting to start with your biggest tool or the latest upgrade. But that mindset often leads to wasted time, poor flow, and frustration you could’ve avoided.
Your shop isn’t a collection of machines. It’s a system.
And like any system, it only works when the core is rock-solid.
In this post, I’ll walk you through the five stations that define your DIY woodworking shop’s layout, efficiency, and long-term usability. These stations aren’t just functional on their own, they’re designed to support each other.
I’m not sharing theory or wishlists here. I’ve built three different shops, including one in a playroom and another crammed between lawnmowers and bikes. What you’ll find below is real-world advice from someone who’s made most of the classic mistakes (so you don’t have to).
Whether you’re starting from scratch or rebuilding from experience, this is your foundation.
Let’s build a shop that works for you, not against you.
What Makes a Good DIY Woodworking Shop Layout?
Before diving into the builds, let’s take a minute to talk shop layout. A woodworking shop isn’t just a garage with tools-it’s a working system. Whether your space is small or sprawling, how you arrange your work zones will make or break your flow.
Think of your wood shop in zones:
- Material entry: where lumber arrives and gets broken down
- Processing: where you cut, plane, and route parts to size
- Assembly: where everything comes together
- Finishing and storage: where you wrap up and reset
Every one of the five stations below fits into these zones and connects them. That’s where the magic happens.
5 Core Stations for Building a Woodworking Shop That Works
1. Your Workbench – The Command Center of Your Shop
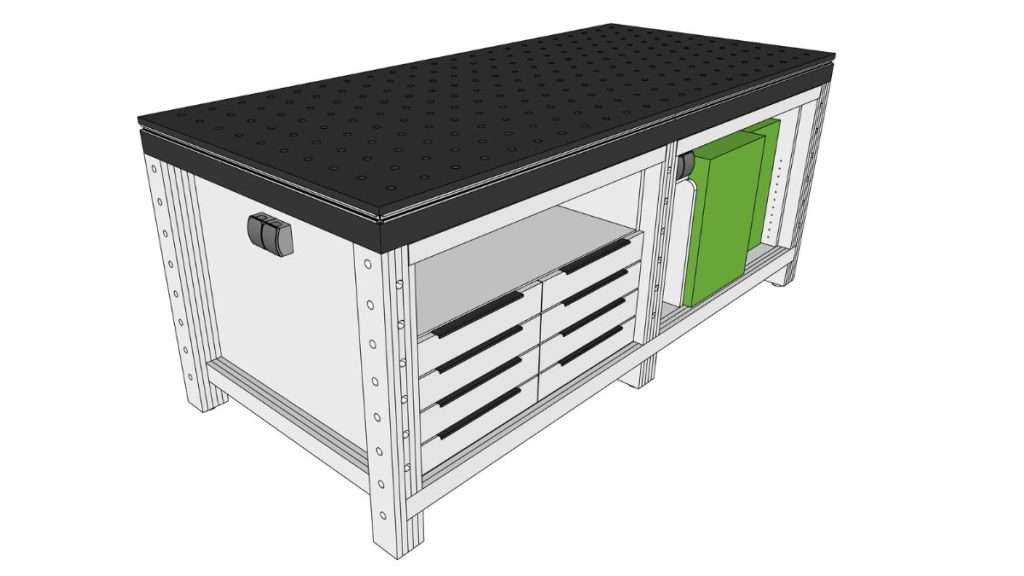
If your shop were a ship, this would be the captain’s deck.
Everything starts here. Your layout, your accuracy, even how much you actually enjoy being in the shop – it all comes back to this one surface. In many ways, it’s the anchor point for building a woodworking shop that functions the way you need it to.
But let me be real with you.
My first “workbench” was made from MDF and looked decent at first, until it started sagging in the middle after just a few months. I had tried to be clever by giving it an MFT-style top, but the holes were too large and spaced too far apart to be of much use. The base included some overly deep cabinets that collected dust like a magnet and couldn’t even be closed properly. I thought I was being smart with that build. In reality, I was just setting myself up for frustration.
The truth is, your workbench is not just another build. It’s the one tool you’ll use on every project you make. For anyone setting up a DIY woodworking shop, getting this station right is a huge step toward better workflow.
A proper workbench should:
- Provide a flat, stable surface that stays flat over time
- Make layout and clamping easy and intuitive
- Be the right height so your back doesn’t hate you
- Serve as your staging area for tools, jigs, and parts
- Adapt as your skills and needs evolve
Whether you go with a traditional cabinetmaker’s bench, an MFT-style surface with bench dogs, or a hybrid version like mine, the goal is always the same: function first.
Full Build Guide: How to Build a Functional and Future-Proof Workbench (Still working on this post, want to be the first to read it? Join the newsletter and I’ll send it your way when it’s ready.)
And here’s something most people don’t tell you: it’s okay to build a “first” version. One that’s not perfect. Because a flat surface, even a temporary one, will make every project easier. You can always upgrade later.a temporary one, will make every project easier. You can always upgrade later.
Quick tip: Build your bench before you build anything else. Working on the floor gets old fast.
2. The Miter Saw Station – Built for Speed and Support
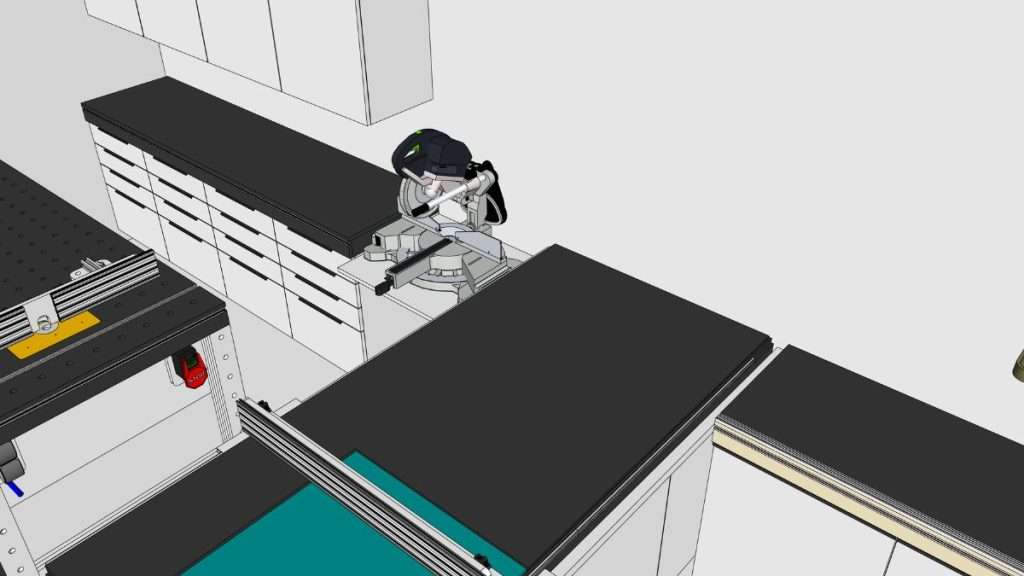
Let’s face it. If you’re using a miter saw on a folding table or balancing boards on your knee, you’re not working smart. You’re surviving.
I did that for years. I’d prop long boards up on a stepladder and hope the cut wouldn’t bind halfway through. Spoiler: it often did. My cuts were inconsistent, my setups slow, and I wasted more wood than I care to admit.
That changed the moment I built a proper miter saw station. It was one of the first big wins when I really started building a woodworking shop that worked for me instead of against me.
A good miter saw setup does more than hold the tool. It makes cutting safer, faster, and far more accurate. Here’s what it should give you:
- Consistent support on both sides of the blade
- Built-in stop blocks for repeatable cuts
- Integrated storage for blades, clamps, and offcuts
- Dust control that doesn’t just blow particles around
- A flat reference surface that stays aligned
My current station runs wall to wall and doubles as a cutting center and clamp storage zone. Every drawer has a purpose. Every inch is used.
Full Build Guide: Designing a Miter Saw Station with Storage and Support
Want to build smarter? Position this station close to your lumber rack or where material first enters the shop. That way, your rough cuts happen fast and early, without walking laps.
3. The Table Saw Workcenter – Maximize the Beast
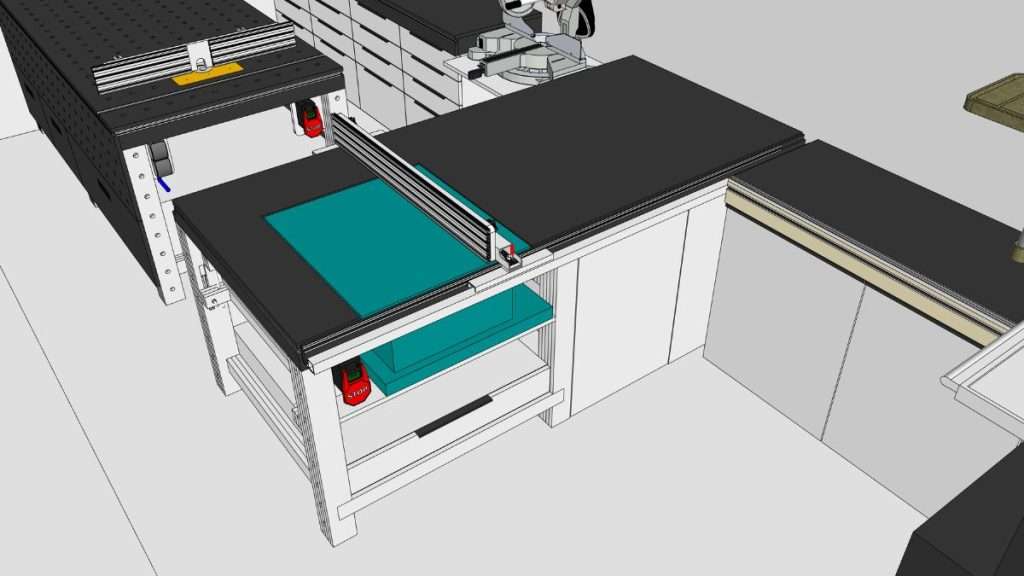
Your table saw is probably the most powerful tool in your shop. It’s also the most demanding when it comes to space, safety, and setup.
In my early days, I rolled mine into the middle of the floor, made a few cuts, and rolled it back against the wall. No outfeed. No storage. Every rip cut felt like a gamble, and every setup took forever. It got the job done, sure, but it wasn’t efficient. And it definitely wasn’t safe. This kind of setup is something I see often in any woodworking shop for beginners, and I made the same mistakes.
Building a dedicated table saw workcenter changed everything.
A solid setup should give you:
- A full-sized outfeed table that doubles as a secondary work surface
- Storage underneath for blades, push sticks, featherboards, and jigs
- Optional upgrades like a router lift, crosscut sled storage, or T-track integration
- A layout that allows you to move freely and keep long boards supported
My version includes drawers for accessories, a fence stop block system, and a replaceable zero-clearance insert right in the outfeed top. I use it daily, and honestly, I can’t imagine going back.
Full Build Guide: How to Build a Table Saw Workcenter with Storage and Outfeed Support (Still working on this post, want to be the first to read it? Join the newsletter and I’ll send it your way when it’s ready.)
This station is also where you can really dial in efficiency. Add hooks for push sticks. Install casters if you need mobility. Set it at the same height as your workbench for even more versatility.
4. Storage – Real Cabinets, Real Use
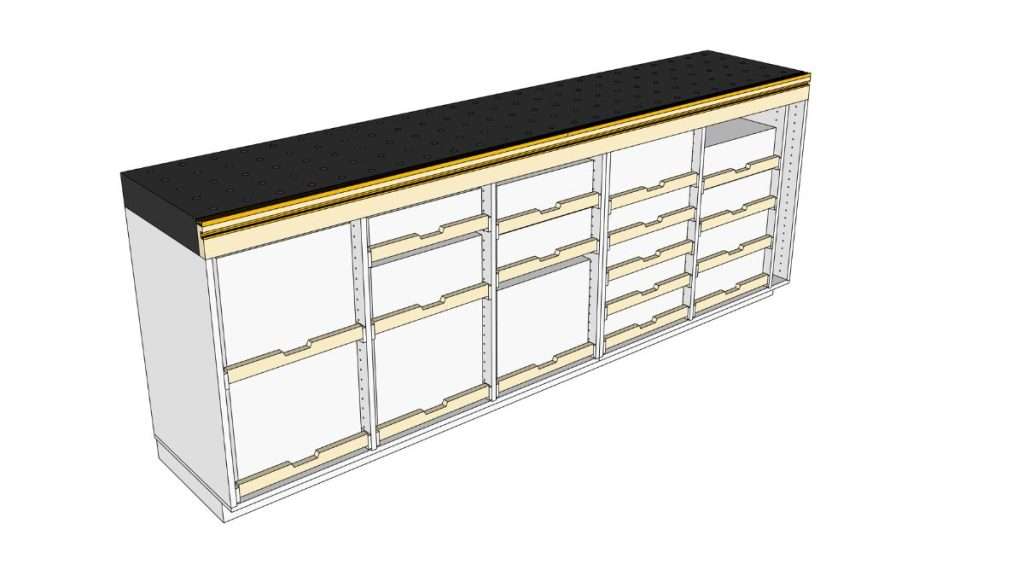
Let’s be honest. A messy shop doesn’t just slow you down, it wears you out. Ever spent 10 minutes looking for the right driver bit, only to find it under a pile of clamps? Been there. Too many times.
At one point, I stored screws in yogurt cups and shoved everything else into whatever drawer had space. Drill bits mingled with dried-up glue sticks, loose wire, and an old tape measure that never retracted. It wasn’t a system. It was survival.
That’s when I decided to rethink storage entirely. Not just where I put things, but why. What do I reach for most? What always gets buried? What’s never where I think it is?
Figuring that out was a key part of learning how to build a woodworking shop that actually made sense for the way I work.
For me, that led to:
- Deep drawers for the heavy stuff
- Shallow ones with place for inserts for bits and blades
- A clamp rack I can reach with one hand while holding a project with the other
- Wall cabinets for finishes, sanding sheets, and spare tape rolls
- Labels. Yes, even for the obvious drawers. Especially those.
I built my cabinets to fit under my workbench and miter saw station. Same depth, same look. Then I added uppers to use the wall space. It’s not fancy, but it feels like me. And more importantly, it works. Fast.
Learn How: Smart Storage Solutions for Base Cabinets, Drawers, and Upper Shelves (Still working on this post, want to be the first to read it? Join the newsletter and I’ll send it your way when it’s ready.)
Good storage doesn’t mean everything’s hidden away. It means you can walk into your shop, grab what you need, and get to work without losing momentum.
And if that saves you 15 minutes a day? That’s hours gained over a year. More time to build. Or more time for coffee. Your call.
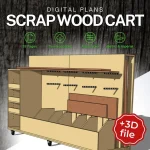
5. Scrap Wood Cart – Reclaim Your Floor Space
Let’s talk offcuts. They pile up faster than you expect, a small strip here, a corner block there, and suddenly your shop floor’s a minefield of ‘maybe I’ll use this one day’ pieces.
When I first got into woodworking, I kept every scrap. Good wood’s expensive, right? But I had no system. I tossed leftovers in cardboard boxes, leaned them against walls, or just let them gather in corners. Before long, I was spending more time stepping over wood than actually working with it.
That’s when I built a scrap wood cart, and it changed everything.
You don’t need a huge bin or industrial solution. Just something mobile, organized, and easy to dump pieces into without starting a Jenga tower.
Here’s what worked best in my setup:
- Dividers for small, medium, and long pieces
- One narrow section for plywood and MDF offcuts
- Heavy-duty casters so it moves effortlessly around the shop
- Low enough to fit under a workbench or tool station
- An open top design so I don’t have to wrestle awkward chunks in or out
I park mine near the table saw, right where most offcuts happen. It’s out of the way but never out of reach. And when it fills up? I can roll it over to the trash or storage wall, sort through what stays, and clear my space again.
Learn how to build a Mobile Scrap Wood Cart with Dividers and Smart Layout just like mine (Still working on this post, want to be the first to read it? Join the newsletter and I’ll send it your way when it’s ready.)
It’s not just a cart. It’s how I keep clutter from creeping in and killing my momentum. Less mess, less stress, and a cleaner space that actually makes me want to build.
How These Stations Work Together
Each station we’ve talked about plays a vital role. But on their own? They’re just pieces. The real strength comes when they start working together.
In one of my earlier shops, I had all the tools, a solid bench, decent saws, even storage I had put actual thought into. But the layout? A mess. I’d cut something on the miter saw, walk across the room to clean it up, then realize the table saw was blocked by a stack of offcuts. Every project felt like I was working around my shop instead of in it.
That’s when it clicked. Building a woodworking shop isn’t just about putting tools in a room. It’s about how those tools, stations, and workflows connect in a way that supports how you build.
A great layout makes your next move obvious. It shortens the distance between idea and action. It lets your workflow breathe.
Place your miter saw near where your lumber comes in. Line up your outfeed table with your workbench. Mount storage where your hands naturally reach. It’s not about making everything perfect. It’s about making everything flow.
A good shop feels quiet, focused, and ready. No wasted motion. No mental clutter. Just you, your tools, and the work.

This Was Step 2 of the Full Guide
This post is part of Step 2 of my full workshop setup roadmap, where we move from planning into building.
If you want to dive deeper into specific parts of the planning process, explore the supporting posts by following the links in this article.
If you’re ready to move beyond the core builds and focus on improving air quality, dust control, lighting, safety, and a cleaner workflow, dive into step 3: 9 Steps to a Clean, Safe Workshop That Makes You Proud
Want the full picture? Return to the main guide: How to Set Up a Woodworking Shop Like a Pro – 4 Clear Steps
Let’s build smart.
Let’s build something that lasts.
Let’s build it right from the start.
Christophe – Ash Stag Woodworking




Leave a Reply