Woodworking materials are easy to overlook until you start noticing how much they shape your projects. I remember that moment myself. You think materials are just wood or plywood, but then you realise the glue you use matters, the hardware changes how things move and the finish decides how the whole project feels in your hands.
This chapter pulls everything together in one clear place.
Not as a long shopping list, but as a simple way to understand the materials for woodworking you will reach for most and why they matter. Some of them you already use without thinking. Others might be things you have seen in videos but never really understood.
Either way, this is where the choices behind good builds start to make sense.
This chapter is part 3 of the Woodworking Tools and Techniques journey.
Christophe,
If you have not seen the main overview yet, start with the full Woodworking Tools and Techniques guide so everything connects in the right order.
Earlier step in the journey? Go back to Woodworking Techniques (Part 2)
Founder of Ash Stag Woodworking
Choose where you want to start:

Wood and Sheet Materials
Learn the difference between hardwood, softwood and sheet goods so you choose the right base for every project.
Adhesives, Fillers and Repair Materials
See which glues, fillers and simple repair products actually matter and how they keep your builds clean and solid.
Hardware and Fasteners
Understand the screws, inserts and slides you will reach for most and how they change the strength and movement of your projects.
Finishing Products and Surface Prep
Discover the oils, films and prep tools that help your projects look clean, smooth and ready for real use.
Choose where you want to start:
Wood and Sheet Materials
Learn the difference between hardwood, softwood and sheet goods so you choose the right base for every project.
Adhesives, Fillers and Repair Materials
See which glues, fillers and simple repair products actually matter and how they keep your builds clean and solid.
Hardware and Fasteners
Understand the screws, inserts and slides you will reach for most and how they change the strength and movement of your projects.
Finishing Products and Surface Prep
Discover the oils, films and prep tools that help your projects look clean, smooth and ready for real use.

– Updated on
Key Takeaways
– You’ll understand how woodworking materials actually influence strength, stability and the final look of your projects, instead of feeling like you are guessing in the lumber aisle.
– You’ll learn the core differences between wood types, sheet goods, adhesives, hardware and finishing products, and why each group matters at the right moment in a build.
– You’ll see which materials beginners often overlook and how small choices, like the glue you use or the screws you pick, quietly affect the quality of your work.
– You’ll know how to choose materials with more confidence by understanding how they behave, how they interact and how they support each step of your project.
– Most importantly, you’ll stop treating materials as simple accessories and start using them as real building tools that make your projects stronger, cleaner and more enjoyable to build.
Disclosure: At zero cost to you, I may get commissions for purchases made through links in this post. I earn from qualifying purchases as an Amazon associate. Products featured are selected based on quality, performance, and reputation, regardless of affiliate relationships.
Table of Contents
What Woodworking Materials Actually Are
Most people think woodworking materials are just the pieces of wood they buy at the store, but there is much more hiding under that word. When you look at a project that feels solid, smooth and well made, it is almost never because of the tool choices alone. It is the materials behind the scenes that decide how everything behaves, fits together and holds up over time.
To keep things simple, beginners can think of woodworking materials as four big groups.
Each group does something different, but they all work together on one project.
| Material Group | What It Includes | Why It Matters |
|---|---|---|
| Wood and Sheet Goods | hardwood, softwood, plywood, MDF | Base structure of every project, affects stability and movement |
| Adhesives and Fillers | wood glue, epoxy, wood filler | Controls bond strength and how clean your surfaces look |
| Hardware and Fasteners | screws, threaded inserts, drawer slides, hinges | Adds strength, movement, alignment and durability |
| Finishing Products | oils, varnishes, film finishes, waxes, sanding grits | Protects the wood and defines the final look and feel |
If you understand these groups, you already understand more than most beginners who focus only on the cut list or the tools. A project is not just built with tools. It is built with the choices you make long before you start assembling the parts.
“Good materials make your techniques easier, not harder”.
It feels like the opposite should be true, but it never is.
Wood and Sheet Materials for Beginners
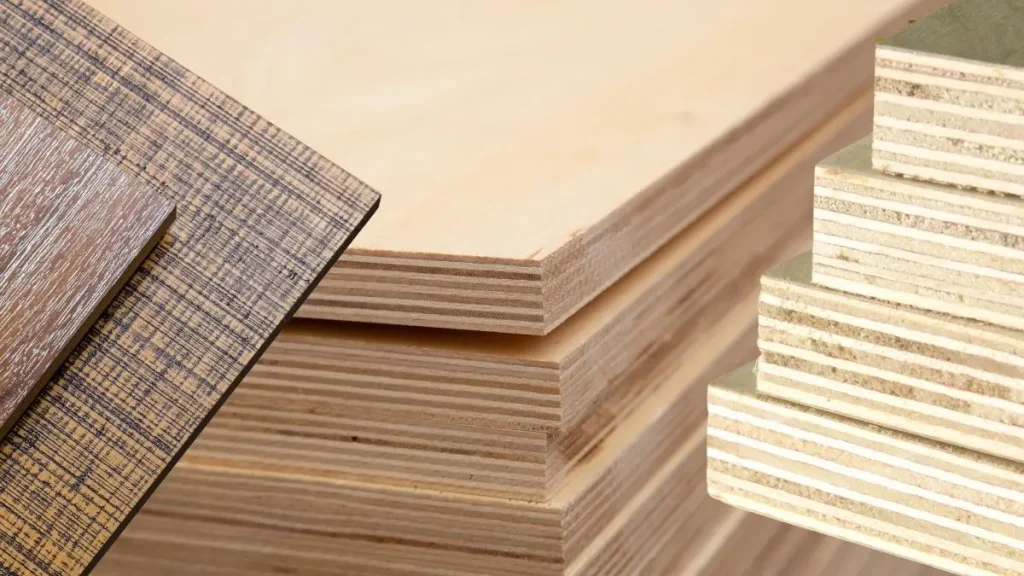
Wood materials are usually the first group people think about, and honestly, that makes sense. They form the structure, the weight and even the personality of a project. But if je ooit al hebt gemerkt dat twee stukken hout zich anders gedragen terwijl je dacht dat ze “hetzelfde” waren, dan weet je dat er meer aan de hand is.
This section gives you a clear way to compare the most common materials for woodworking without drowning in jargon or pointless details.
The basics in one simple table
| Wood Material | What It Is | When It Helps Most |
|---|---|---|
| Softwood | Pine, fir, spruce | Practice builds, home projects, light frames |
| Hardwood | Oak, ash, beech, maple | Furniture, durability, clean edges |
| Plywood | Layers of wood veneer | Stable panels, cabinets, jigs |
| MDF | Wood fibers and resin | Smooth surfaces, painted projects |
A beginner does not need to memorize species or grain patterns.
What matters most is understanding how these materials behave.
How wood behaves in real builds
Hardwood feels strong and reliable, but it moves with humidity.
Softwood is forgiving and budget friendly, but dents easily.
Plywood stays flat even when the seasons change.
MDF cuts beautifully and paints even better, but hates moisture.
A quiet truth I learned after ruining more panels than I like to admit: The material decides what your project will tolerate long before your tools do.
A small tip for beginners
If you are unsure which wood materials to start with, try this:
- practice joinery in softwood
- build shelves and cabinets in plywood
- make decorative or painted pieces in MDF
- save hardwood for your first real furniture piece
It is a simple path that helps you grow without wasting supplies for woodworking or getting stuck with materials you are not ready for.
When you want to dive deeper, you can open the full guide Wood and Sheet Materials for Beginners (Under construction). Everything in that chapter builds on the foundation you learned here.
Adhesives, Fillers and Repair Materials for Woodworking
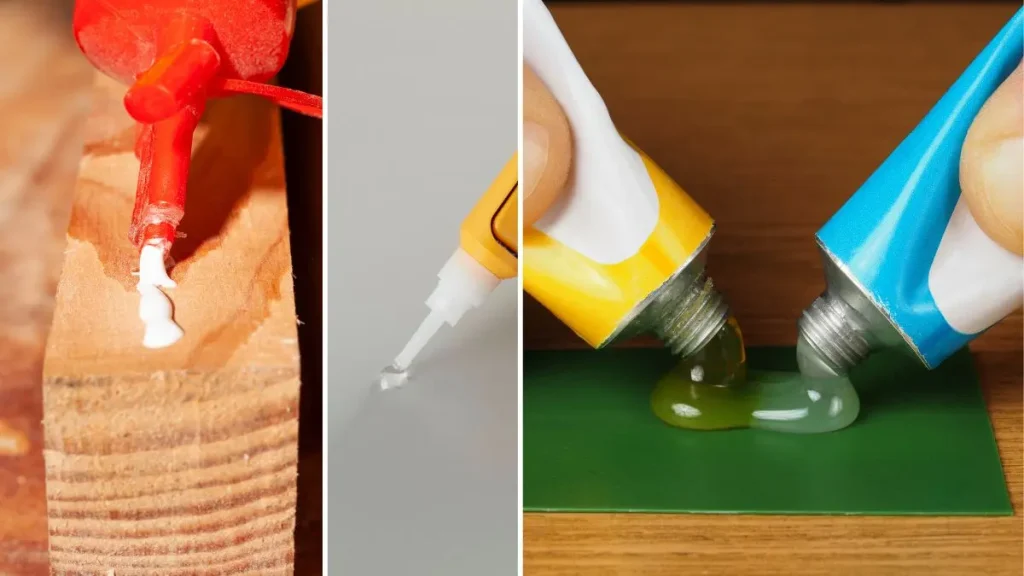
Most people discover this part of woodworking the hard way.
You finish a project, you step back, and then you spot gaps, dents, glue smears, or a joint that did not tighten the way you hoped. It is completely normal. Wood is a natural material. It moves, it chips, it absorbs. And because of that, every woodworker ends up relying on adhesives and fillers sooner or later.
This section helps you understand the small group of materials that quietly save your projects.
The essentials at a glance
| Material | What It Does | When You Need It Most |
|---|---|---|
| Wood glue | Bonds wood fibers together | Almost every project you build |
| Epoxy | Fills cracks and reinforces weak spots | Repairs, knot holes, gap filling |
| Wood filler | Smooths dents and small flaws | Visible surfaces before finishing |
| CA glue | Fast bonding for tiny fixes | Small repairs, temporary holds |
Beginners often think wood glue is just “glue.”
But in woodworking, it is one of the strongest materials you own. A clean joint with good glue contact is stronger than the wood itself. The tricky part is using it well.
A simple rule for glue work
More glue does not mean more strength.
It only means more squeeze out.
A thin and even layer works best and makes finishing much easier, especially if you want clean results with woodworking finishing products later on.
What about epoxy and fillers
Epoxy looks intimidating at first, but it is really just a two part mixture that helps you fix things you thought were ruined. It fills gaps that wood glue cannot fix, and it builds strength where screws or clamps fall short.
Wood filler is different. It is not for structural support.
It is for appearance.
Think of it as makeup for minor mistakes before applying your final finish.
CA glue sits somewhere in between. It is fast, sharp and perfect for tiny fixes like chipped corners, small cracks or stopping tearout before it spreads.
A small tip for beginners
Start simple.
Before you explore all kinds of advanced products:
- learn how to apply wood glue cleanly
- keep a small bottle of CA glue nearby
- try filler only when you understand how your finish reacts to it
- leave epoxy for repairs or special projects
This keeps your supplies for woodworking affordable and predictable while you grow.
If you want to explore each product deeper and learn when to use which one, you can continue with the guide Adhesives, Fillers and Repair Materials for Woodworking (Under construction). It expands every idea you saw here without overwhelming you.
Hardware and Fasteners for Woodworking
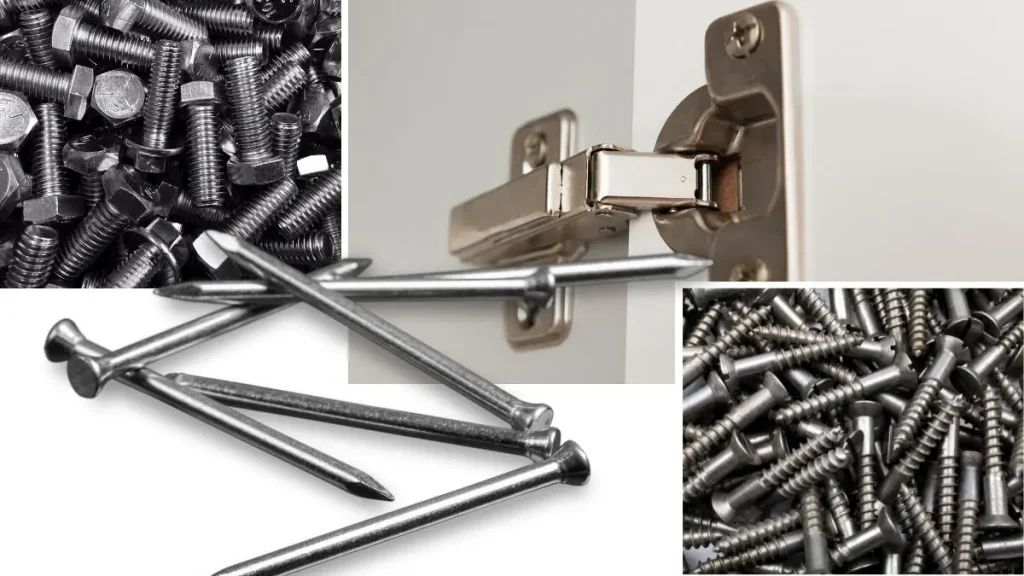
Hardware is one of those things you ignore… until you need it. Screws, inserts, hinges and slides look small, but they decide how your project moves, opens, carries weight and survives years of use. Good woodworking materials are the structure, but hardware is what makes that structure actually function.
This section gives you a calm overview so you can choose hardware with confidence instead of guessing in the aisle at the store.
The essentials in one clear table
| Hardware | What It Does | When It Helps Most |
|---|---|---|
| Wood screws | Fastens parts together | Cabinets, frames, shop projects |
| Threaded inserts | Creates strong machine threads in wood | Jigs, adjustable furniture, knockdown builds |
| Drawer slides | Lets drawers move smoothly | Cabinets, organizers, shop storage |
| Brackets and corner braces | Adds structure and stability | Quick fixes, reinforcing weak joints |
A lot of beginners feel unsure around hardware because it looks technical.
But here is the truth I wish someone told me earlier:
Most hardware works beautifully when the wood is prepared well.
The frustration usually comes from the surface, not the screw.
Choosing the right screw
You do not need twenty types of screws.
You need a small set that works for almost everything:
- standard wood screws for most builds
- pocket hole screws for pocket joinery
- machine screws only when paired with inserts
- longer screws only when you have enough material to bite into
A good rule of thumb:
A screw should go in smoothly and hold firmly without splitting. If it struggles, the pilot hole is wrong, not the screw.
Where threaded inserts make life easier
Threaded inserts feel like a pro feature, yet they are beginner friendly once you try them. They let you use machine screws in wood, which means you can:
- add adjustable feet under furniture
- build knockdown benches or cabinets
- create replaceable parts in jigs
- mount components without stripping wood fibers
Small projects often benefit the most from them because they stay tight even when you adjust or disassemble things repeatedly.
Drawer slides without frustration
Slides only work well when the wood is square and flat.
If the drawer box is out of alignment by even a couple of millimeters, the slide will tell you immediately. Take it slowly, measure twice and keep the parts parallel.
A simple tip that saves you a lot of trouble:
Mark a consistent reference edge on every drawer part.
It keeps your layout clean and prevents uneven fitting.
When you want a deeper look at each group of hardware and how to choose them for your own builds, you can later open the full guide Hardware and Fasteners for Woodworking (Under construction). It connects every idea in this section to real building scenarios without overwhelming you.
Finishing Products and Surface Prep for Woodworking
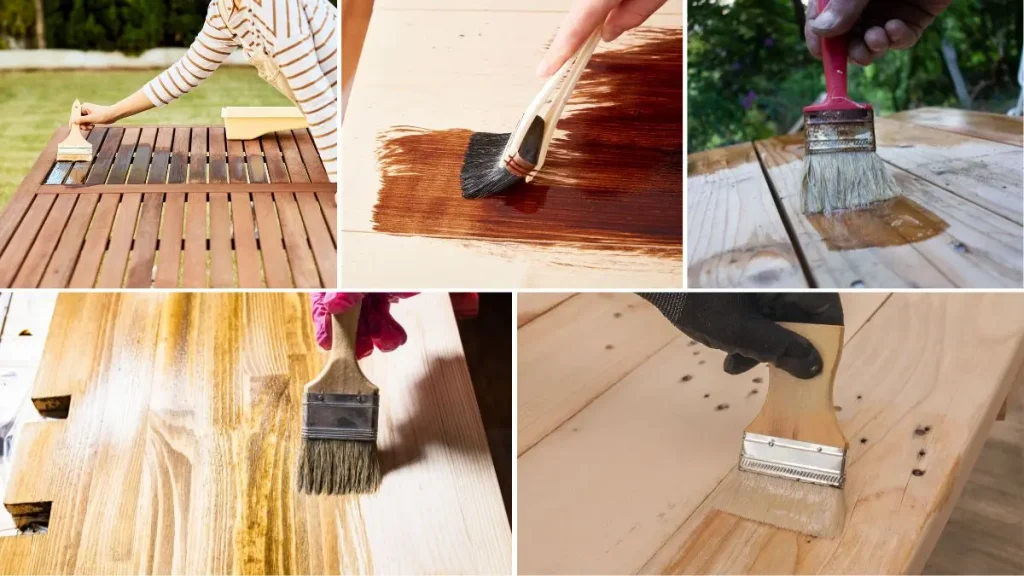
Finishing is one of those stages people rush through, even ervaren houtbewerkers. You build something you are proud of, the dust settles, and you just want it done. But the truth is simple: your finish decides how your project looks, feels and survives daily use. It is also the place where good woodworking materials finally come to life.
This section helps you understand the woodworking finishing products you will reach for most, without drowning in chemistry or complicated instructions.
The products you will see again and again
| Product | What It Does | When It Helps Most |
|---|---|---|
| Danish oil | Soaks into the wood for a natural look | Everyday furniture, soft sheens, beginners |
| Tung oil | Creates a harder, water resistant finish | Cutting boards, work surfaces, durable builds |
| Polyurethane | Adds a strong protective film layer | Tabletops, high wear areas, children’s furniture |
| Shellac | Dries fast and adds warm color | Small projects, touch ups, classic finishes |
These are the woodworking finishing products that carry you through almost any build. You do not need all four right away. You need one finish you can apply well.
A small truth I learned the hard way: A simple finish applied properly always looks better than an advanced finish applied in a rush.
How to prep your wood before finishing
Good finishing starts long before the first coat. Wood materials need to be smooth, dust free and consistent if you want a clean result. The surface prep matters more than the brand of finish you pick.
A basic checklist that works for almost everyone:
- sand evenly through the grits
- vacuum with a soft brush to lift dust from the pores
- wipe with a clean cloth
- check for glue spots under strong light
- feel the surface with your fingertips, not just your eyes
Most mistakes come from skipping one of these steps, not from choosing the wrong supplies for woodworking.
Common finishing challenges beginners face
- Bubbles in your finish: Usually caused by shaking the can or using a foam brush too aggressively.
- Brush marks: Often due to thick coats or working too slowly in warm rooms.
- Rough grain after the first coat: This is normal because the wood fibers rise. A quick sand fixes it.
- Glue stains that stay visible: You cannot hide them with finish. They must be removed before you start.
Tip: Try your finish on a scrap piece from the same material as your project. Wood materials vary more than you expect, and the color, absorption and texture can change dramatically. A tiny test board saves you hours of frustration.
When you are ready to explore each type of finish in more detail, you can continue with the chapter Finishing Products and Surface Prep for Woodworking (Under construction). It breaks down every product and technique in a simple, friendly way so you can finish confidently instead of guessing your way through it.
Where to Go Next
If you want to explore these woodworking materials even deeper, or you are ready to move forward in the journey, here is where you can head next.
Want more detail on this stage?
These guides belong to this chapter and cover each tool group in full.

Go to Part 1
(Under construction)
Wood and Sheet Materials
Understand the basics of softwood, hardwood, plywood and MDF so you can choose smart and build confidently.
Go to Part 2
(Under construction)
Adhesives, Fillers and Repair Materials
Learn how glues and fillers support clean joints, small fixes and stronger builds.
Go to Part 3
(Under construction)
Hardware and Fasteners
Get clear on screws, inserts and slides so your projects hold together the way they should.
Go to Part 4
(Under construction)
Finishing Products and Surface Prep
See how to prep wood and choose simple finishes that look good without extra effort.
If you’re ready to go deeper or move forward in the journey, here’s where you can head next.
Go to Part 1 (Under Construction)
Wood and Sheet Materials
Understand the basics of softwood, hardwood, plywood and MDF so you can choose smart and build confidently.
Go to Part 2 (Under Construction)
Adhesives, Fillers and Repair Materials
Learn how glues and fillers support clean joints, small fixes and stronger builds.
Go to Part 3 (Under Construction)
Hardware and Fasteners
Get clear on screws, inserts and slides so your projects hold together the way they should.
Go to Part 4 (Under Construction)
Finishing Products and Surface Prep
See how to prep wood and choose simple finishes that look good without extra effort.
Ready for the next chapter?
→ Woodworking Safety (Part 4) (Under construction)
Learn the basic shop safety habits that keep you protected while you cut, shape and assemble your projects.
Back to the full journey?
→ Woodworking Tools and Techniques (Main Guide)
Follow the full journey from tools to techniques to safe, accurate building.
Frequently Asked Questions
What woodworking materials should beginners start with
Softwood and plywood are the easiest. They cut cleanly, stay predictable and keep your early projects affordable while you learn.
Is hardwood harder to work with
A bit, yes. It is stronger and can chip more easily, but it also gives cleaner edges and lasts longer. It is perfect once your basic woodworking techniques feel comfortable.
Do I need expensive finishes to get good results
No. A simple oil finish done well often looks better than a complex finish done poorly. Prep and technique matter more than the product.
Are MDF and plywood strong enough for real furniture
What is the biggest mistake beginners make with finishing
Rushing. Most problems come from skipping sanding steps or applying coats too quickly. Slowing down improves the result more than any product can.
Trusted by Woodworkers Worldwide
29,000+ woodworking enthusiasts follow my journey. Over 60 real-world workshop projects completed since 2018.
Discover proven techniques to set up a woodworking shop that grows with you

Meet Christophe
Founder & Woodwork Artisan Behind Ash Stag Woodworking
Regards, Christophe