
The first thing to know about workshop flooring is this: there’s no perfect choice, only the one that makes sense for your space and the way you work.
It sounds simple, maybe even a little too practical, but it’s true.
I started out in a small shed at my parents’ place, working on a wooden floor that felt warm underfoot but never fully solid. You could feel it flex when the air got damp, and I always knew heavier machines would have pushed it past its limits. My garage now has a concrete floor, which is the complete opposite. It’s steady and predictable, but so cold and unforgiving that you feel it in your joints if you stand there long enough. Those two spaces taught me more than any manual ever could.
So flooring matters. More than you notice when you’re just getting started. And once you lay all the different options side by side, things start to make a bit more sense. It’s a good place to begin before you look at what each woodworking floor can offer.
Why You Can Trust This Advice
- I have spent a lot of time working on a bare concrete floor in my small 3×6 meter garage, so I know firsthand how cold and hard it can feel during longer sessions.
- Before that, I worked in a garden shed with a wooden floor, which taught me how flex, moisture and weaker panels behave under tools and movement.
- The tips in this guide come from real use in those two very different spaces, which are similar to the places many beginners start in.

– Updated on
Key Takeaways
– You’ll see how different floors change the way you stand and move during a long day in the shop.
– You’ll notice when a simple mat is enough and when your space asks for something more.
– You’ll understand why comfort, moisture and budget quietly shape which flooring option makes sense.
– You’ll learn how to read the small signs your floor gives you before upgrading anything.
– You’ll see how choosing flooring becomes easier once you pay attention to what your own workspace needs.
Disclosure: At zero cost to you, I may get commissions for purchases made through links in this post. I earn from qualifying purchases as an Amazon associate. Products featured are selected based on quality, performance, and reputation, regardless of affiliate relationships.

Table of Contents
Why Your Workshop Floor Matters More Than You Think
Most people don’t think much about workshop flooring until something starts to bother them. Sometimes it’s the cold creeping up through your shoes. Sometimes it’s the way a tool cart rattles across uneven spots. And sometimes it’s just the strange feeling that your space isn’t as comfortable or predictable as it should be. The truth is that flooring shapes more of your shop experience than you expect, especially once you begin to look at the broader steps of preparing a space the right way.
I still remember the wooden floor in the shed at my parents’ place. Warm and a little forgiving underfoot, but never fully solid. Later, in my garage, concrete brought its own clarity. Strong, predictable and honest about its hardness. Those two extremes taught me why woodworking shop floor types behave so differently. And why the feel of the floor affects how you move, stand and stay focused.
Looking closely at the usual workshop floor ideas is worth the time. Not to chase a perfect solution but to understand what each option adds or takes away. Once that becomes clear, decisions feel a lot simpler.
The Three Main Woodworking Flooring Situations Most Beginners Start With
A bare concrete floor
Concrete is the starting point in most garages. It is stable and tough, and it handles heavy tools without complaint. But during a long sanding session, the real nature of it shows. Cold moves up through your feet, and the hardness asks a lot of your joints. If you want to think about how concrete fits into choosing the right woodworking shop space, it helps to consider both comfort and how the surface affects tool movement.
Concrete also behaves differently during small moments. Screws roll far. Chips bounce where you don’t expect them. Rolling cabinets feel heavier. None of this is dramatic, but all of it shapes your rhythm.
A cold or uncomfortable woodworking floor
Cold floors have a sneaky way of changing your mood. One hour feels fine. Two hours feel acceptable. At three, you notice that your posture shifts and your patience thins. This is where simple mats earn their place. Even one mat, positioned at your main work zone, can shift how your whole shop feels.
Of course, soft surfaces create their own small quirks. Some mats dampen impact but slow down rolling carts. Some are great for assembly but too soft for hand planing. It is part of learning how different woodworking shop floor types behave and how comfort can change your day.
If cold concrete and long hours on your feet are the main issue, a focused guide on fixing cold workshop floors walks through the small changes that make the biggest difference.
A floor that needs quick protection
Sometimes the issue is not comfort but preventing damage. A woodworking floor that stains, chips or absorbs glue too easily makes you cautious. A thin plywood layer, a light coating or even a few basic mats can reduce that tension. These quick solutions buy time without committing you to a full flooring upgrade. And they often reveal bold signs your workshop isn’t fully ready yet.
All Workshop Flooring Options Explained Clearly
Concrete as a base layer
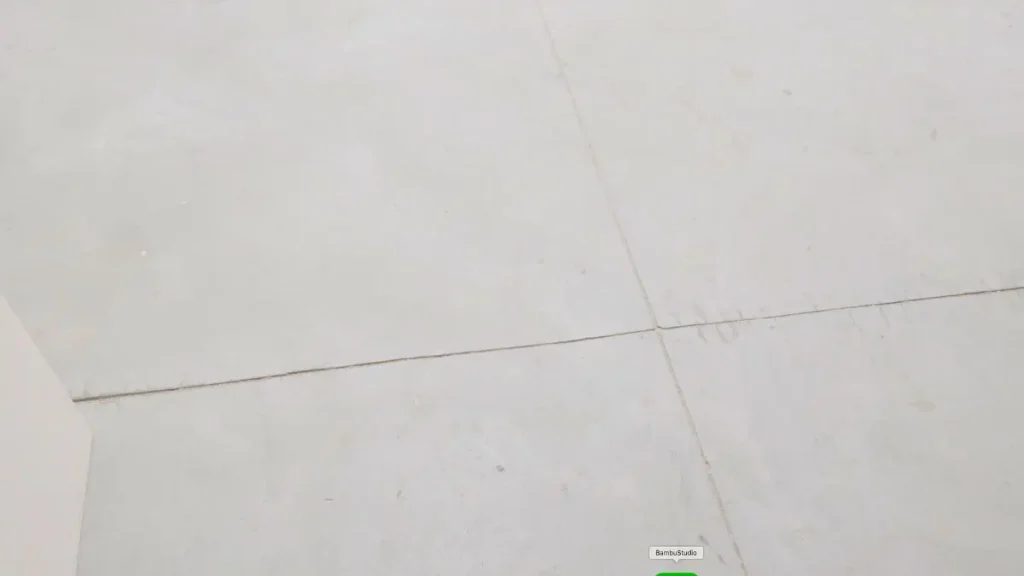
Concrete remains the strongest foundation for flooring for a woodworking shop. It supports weight, stays flat and handles moisture better than many surfaces. But it also asks you to accept its nature. Hard. Cold. A little unforgiving on long build days.
If the floor steals your focus, even a little, it’s worth adding something on top.
Concrete in one glance
Good: it stays solid under heavy tools and never feels unstable.
Not so good: long sessions on bare concrete can leave your joints feeling tired.
If you want a closer look at how concrete behaves, a simple guide to using concrete as a workshop floor walks through the main strengths and weak spots.
Rubber floor mats and anti fatigue mats
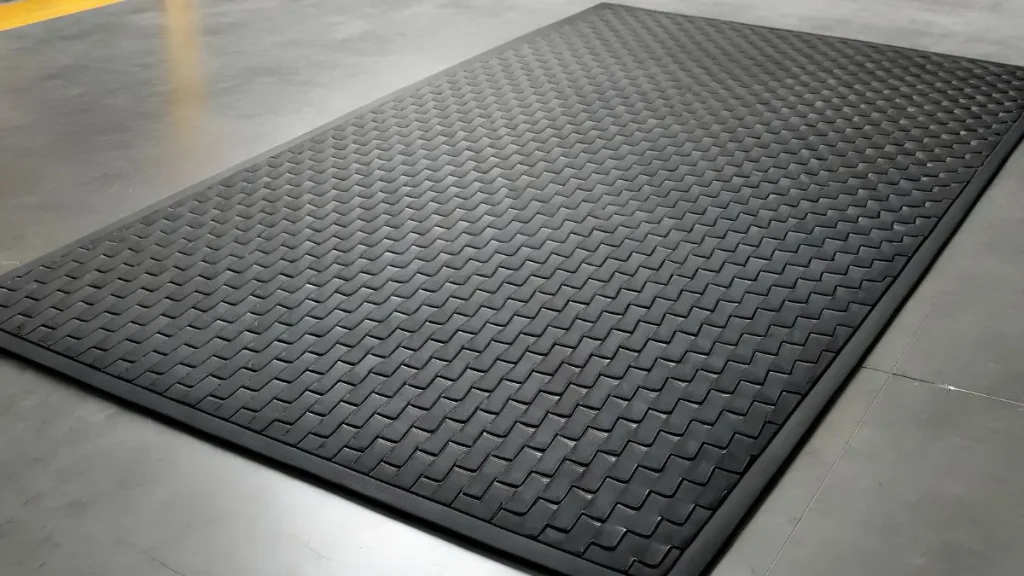
Rubber mats are one of the simplest workshop floor ideas that pays off quickly. They soften movement, reduce impact and make long days feel more manageable. Not all mats behave the same. Some grip better. Some smell for a few days. Some attract dust.
Still, they remain one of the easiest ways to make flooring for workshops feel more humane.
Sometimes it helps to look at how long hours on hard surfaces affect your body, something the ergonomics research from NIOSH highlights in a straightforward way (anchor: NIOSH ergonomics research).
Here is a small comparison:
| Type | Comfort | Durability | Best Use |
|---|---|---|---|
| Soft foam mats | High | Low | Light tasks or temporary setups |
| Rubber mats | Medium | High | General comfort and day to day work |
| Anti fatigue mats | Very high | High | Assembly, sanding, detail tasks |
Tip: If you only buy one mat, place it where you stand the most. That single choice tells you more about your real needs than any list of pros and cons.
Interlocking workshop tiles
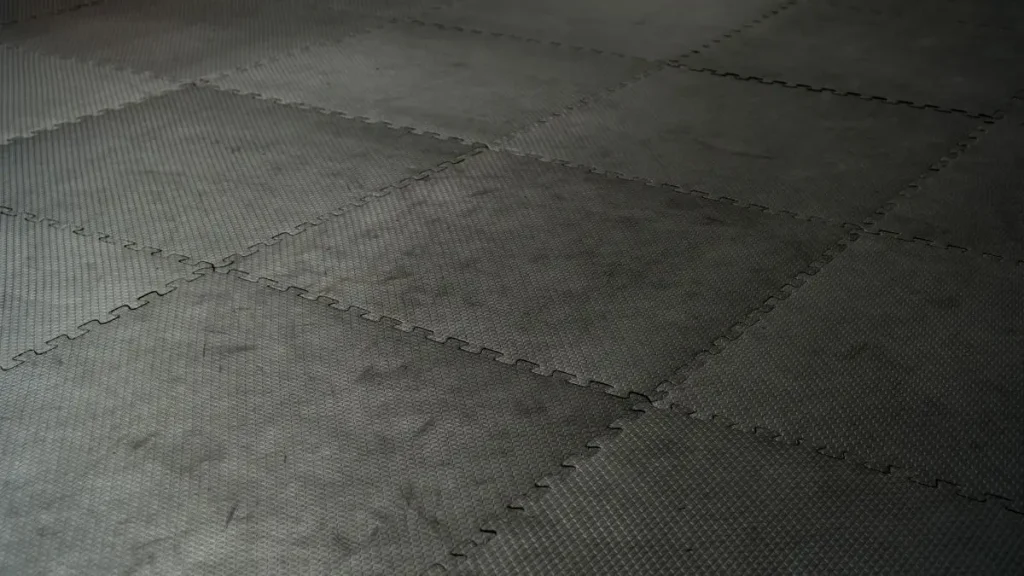
Interlocking tiles often appeal to people who want order without renovation. They hide small dips, cover cracks and create a smoother surface. The slight height increase matters in tight spaces, especially when working with rolling cabinets.
You notice the difference the moment you walk on them. The floor feels warmer and more settled.
You notice the difference the moment you walk on them. The floor feels a bit warmer and smoother, almost like the shop finally decided to settle down.
If your woodworking floor has deeper dips, leveling a workshop floor first can help before placing tiles.
Floor coatings like epoxy and sealers
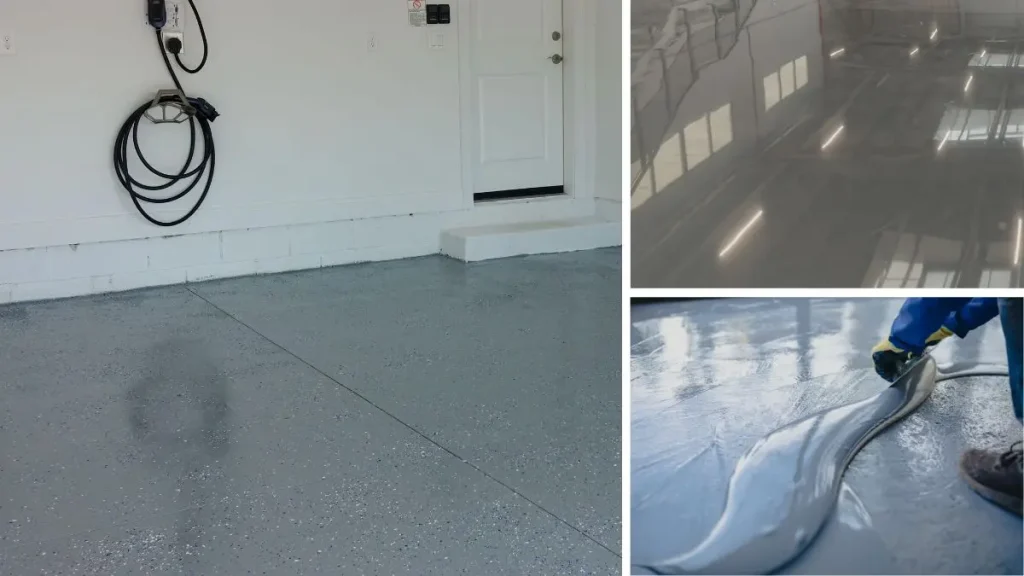
Coatings change the character of the woodworking floor. Epoxy is durable and reflective. Sealers keep things simple and easy to clean. Prep work matters more than most beginners realize. Done well, coatings last years. Rushed work rarely does.
Tip: Give your floor enough time to cure. A coating that feels dry on the surface can still be soft underneath, which affects adhesion and how long the finish lasts.
If spills and stains are your main concern, a practical guide to protecting a workshop floor from damage breaks down what makes the most difference.
Plywood or OSB subfloor panels
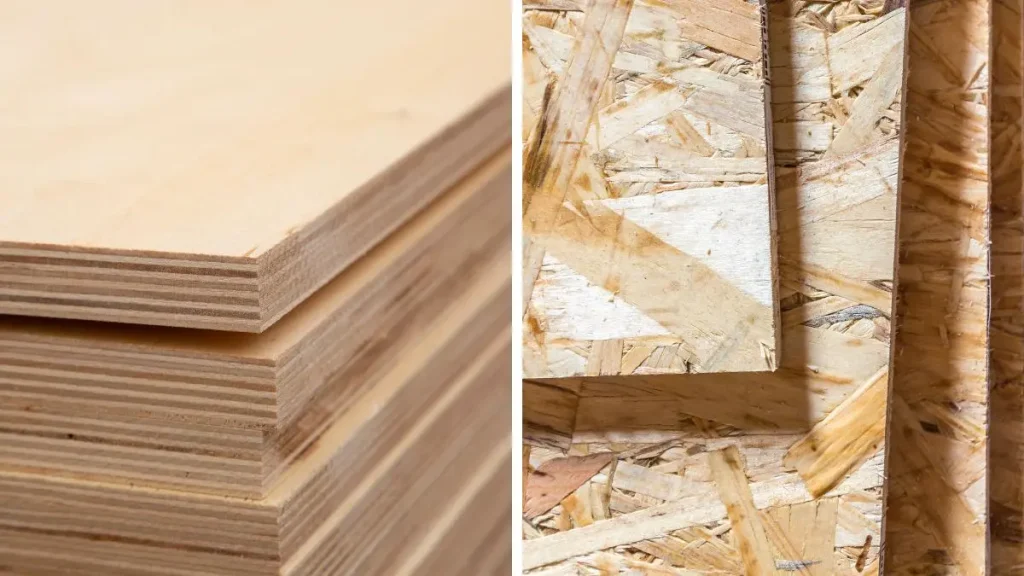
A plywood subfloor softens the feel of flooring for workshops and warms up the space. It gives screws something to bite into and makes mounting fixtures easier. Moisture is the drawback. Garages, sheds and basements behave differently, and humidity changes everything.
If you are thinking about this route, a closer look at plywood or OSB as workshop flooring helps clarify when it works well.
Rubber flooring rolls
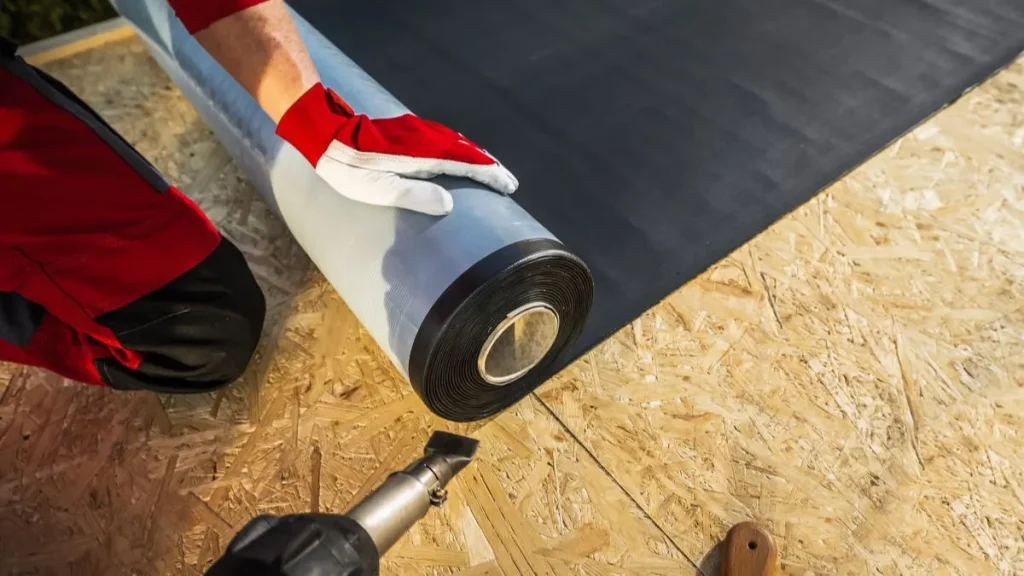
Rubber rolls cover large areas quickly and create a unified surface. They stay quiet, feel steady and roll well under cabinets. Cutting them cleanly takes patience, but the finished result is tidy.
| Best for | Possible drawback |
|---|---|
| Covering large areas quickly | Heavy to handle during installation |
| Smoother rolling movement for carts | Cutting clean edges takes patience |
| A quieter, warmer workspace | Can feel a bit industrial in small shops |
How to Choose the Right Option for Your Situation
Choosing among woodworking shop floor types is mostly about noticing what bothers you first. That usually points you toward the right direction. If you like having a structured path, a dedicated guide to choosing the right workshop flooring option for your situation breaks the decision down calmly.
If comfort is your main problem
Rubber mats and anti fatigue pads offer relief without touching the rest of the surface. Even one mat in a key spot changes how your back feels.
If moisture is your main problem
Tiles, coatings or rubber rolls create a barrier between your tools and damp concrete. Moist spaces often demand one strong decision instead of small fixes. If cold and moisture work together, a beginner friendly guide to insulating a workshop floor helps you separate the two.
If budget is tight
Foam mats, simple rubber mats or a thin plywood layer keep costs low. They won’t last forever, but they help you keep building. If you want ideas, a simple overview of the cheapest ways to upgrade a workshop floor shows what has the most impact for very little money.
If you want a semi permanent upgrade
Tiles, coatings or a plywood subfloor give your space a more finished feel. They cost more but create a strong foundation for future improvements.
Tip: Place one mat in the spot where you work the most. Live with it for a week. The way you stand, move and feel will tell you which flooring direction makes the most sense.
Checklist
- Check how long you usually stand in one spot during a project.
- Notice if cold from the floor creeps into your shoes after a while.
- Look for any spots that stay damp longer than they should.
- Think about whether you need smooth rolling for carts or machines.
- Ask yourself if your current floor slows you down or distracts you.
When a Woodworking Floor Upgrade Can Wait
Some spaces run smoothly on basic flooring. Light builds, short sessions and a mostly dry floor often mean you can wait. Observing how the shop behaves is sometimes the best first step in understanding workshop floor ideas that fit your reality.
A Few Last Thoughts
Stepping back for a moment, it becomes clear that workshop flooring is never just about the surface under your shoes. It has a quiet influence on how long you can work, how confidently you move and how settled the space feels once the tools come out. None of this demands a dramatic decision, but noticing the small things often helps you choose the kind of workshop flooring that actually fits your day instead of interrupting it.
I’ve found that most spaces reveal what they need over time. A cold corner, a noisy patch of concrete, a soft spot that feels off. Paying attention to those little cues makes the next step feel more grounded and less like guesswork.
And from here, it’s easy to see how flooring for workshops fits into the bigger journey of shaping a shop that works with you, not against you.
This supporting post lives inside a much larger path on my site, one that helps beginners move from doubt to a functional first workspace.
Main Guide:
How to Set Up a Woodworking Shop Without Wasting Space in 5 Clear Steps
A calm, structured path that helps you understand how a small workshop comes together piece by piece.
Second Guide Level (comes right after the main guide’s introduction):
Woodworking Shop for Beginners: 3 Steps to Claim Your Space
A beginner friendly guide that helps you make sense of choosing a workable area and shaping it into something you can trust.
Cluster Post (the one that leads into this supporting article):
Learn How to Prepare a Woodworking Shop in 3 Easy Steps
A closer look at the early choices that shape your woodworking floor, walls and overall comfort before you begin building anything.
Frequently Asked Questions
Do I need to upgrade my floor before I start building?
Not always. If your space is dry and the surface feels stable, you can begin with simple projects and notice what actually bothers you before changing anything.
Is concrete alone fine for a small workshop?
For many beginners it is. Concrete is strong and predictable, but it can feel cold and hard during longer sessions, which is why some people add mats or a thin layer of plywood.
What is the easiest way to make a cold floor comfortable?
A single mat in front of your main bench usually helps more than you expect. It gives you a small test area that shows whether you need more comfort or a different kind of support.
How do I know which workshop flooring option fits my situation?
Pay attention to what bothers you first. If it’s comfort, start with mats. If it’s moisture, look at coatings or tiles. Your shop usually tells you where the real problem is.
Does better workshop flooring really change the way you work?
It does in small ways. A floor that supports you keeps you focused longer and makes your movements feel smoother, especially in tight spaces where every step counts.







Leave a Reply